How To Blog
Self Extracting Crank Bolt Maintenance
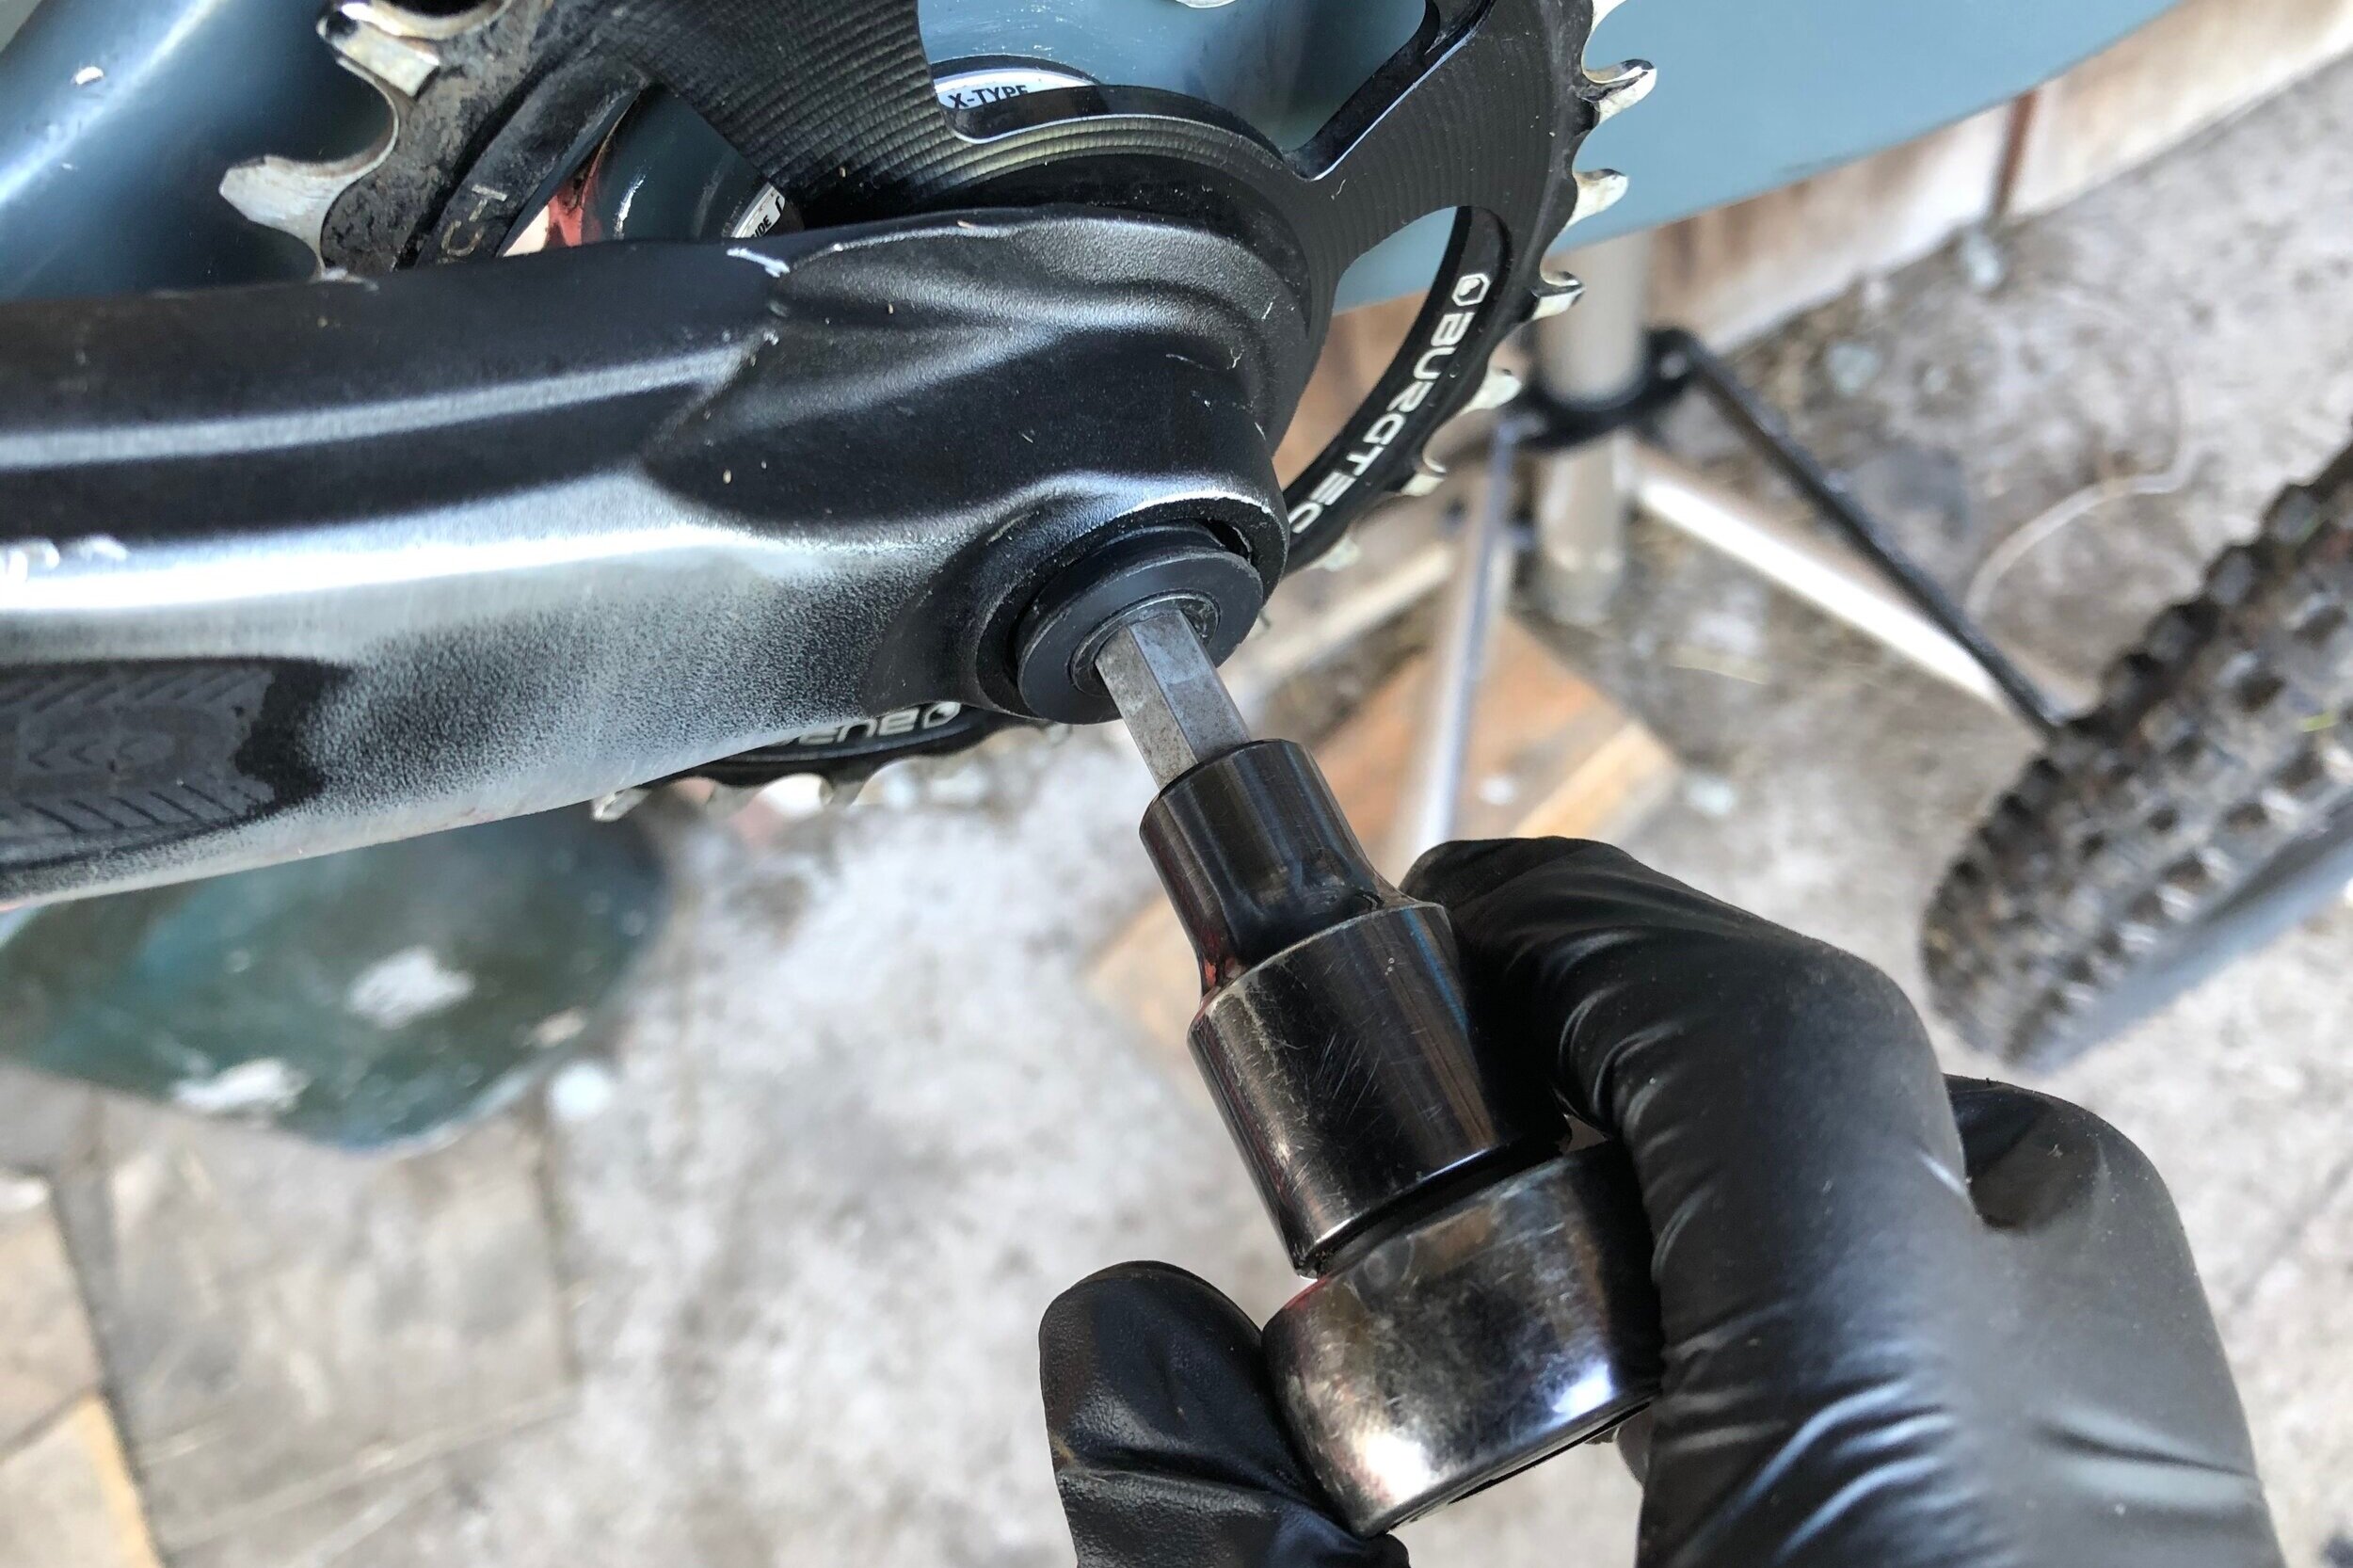
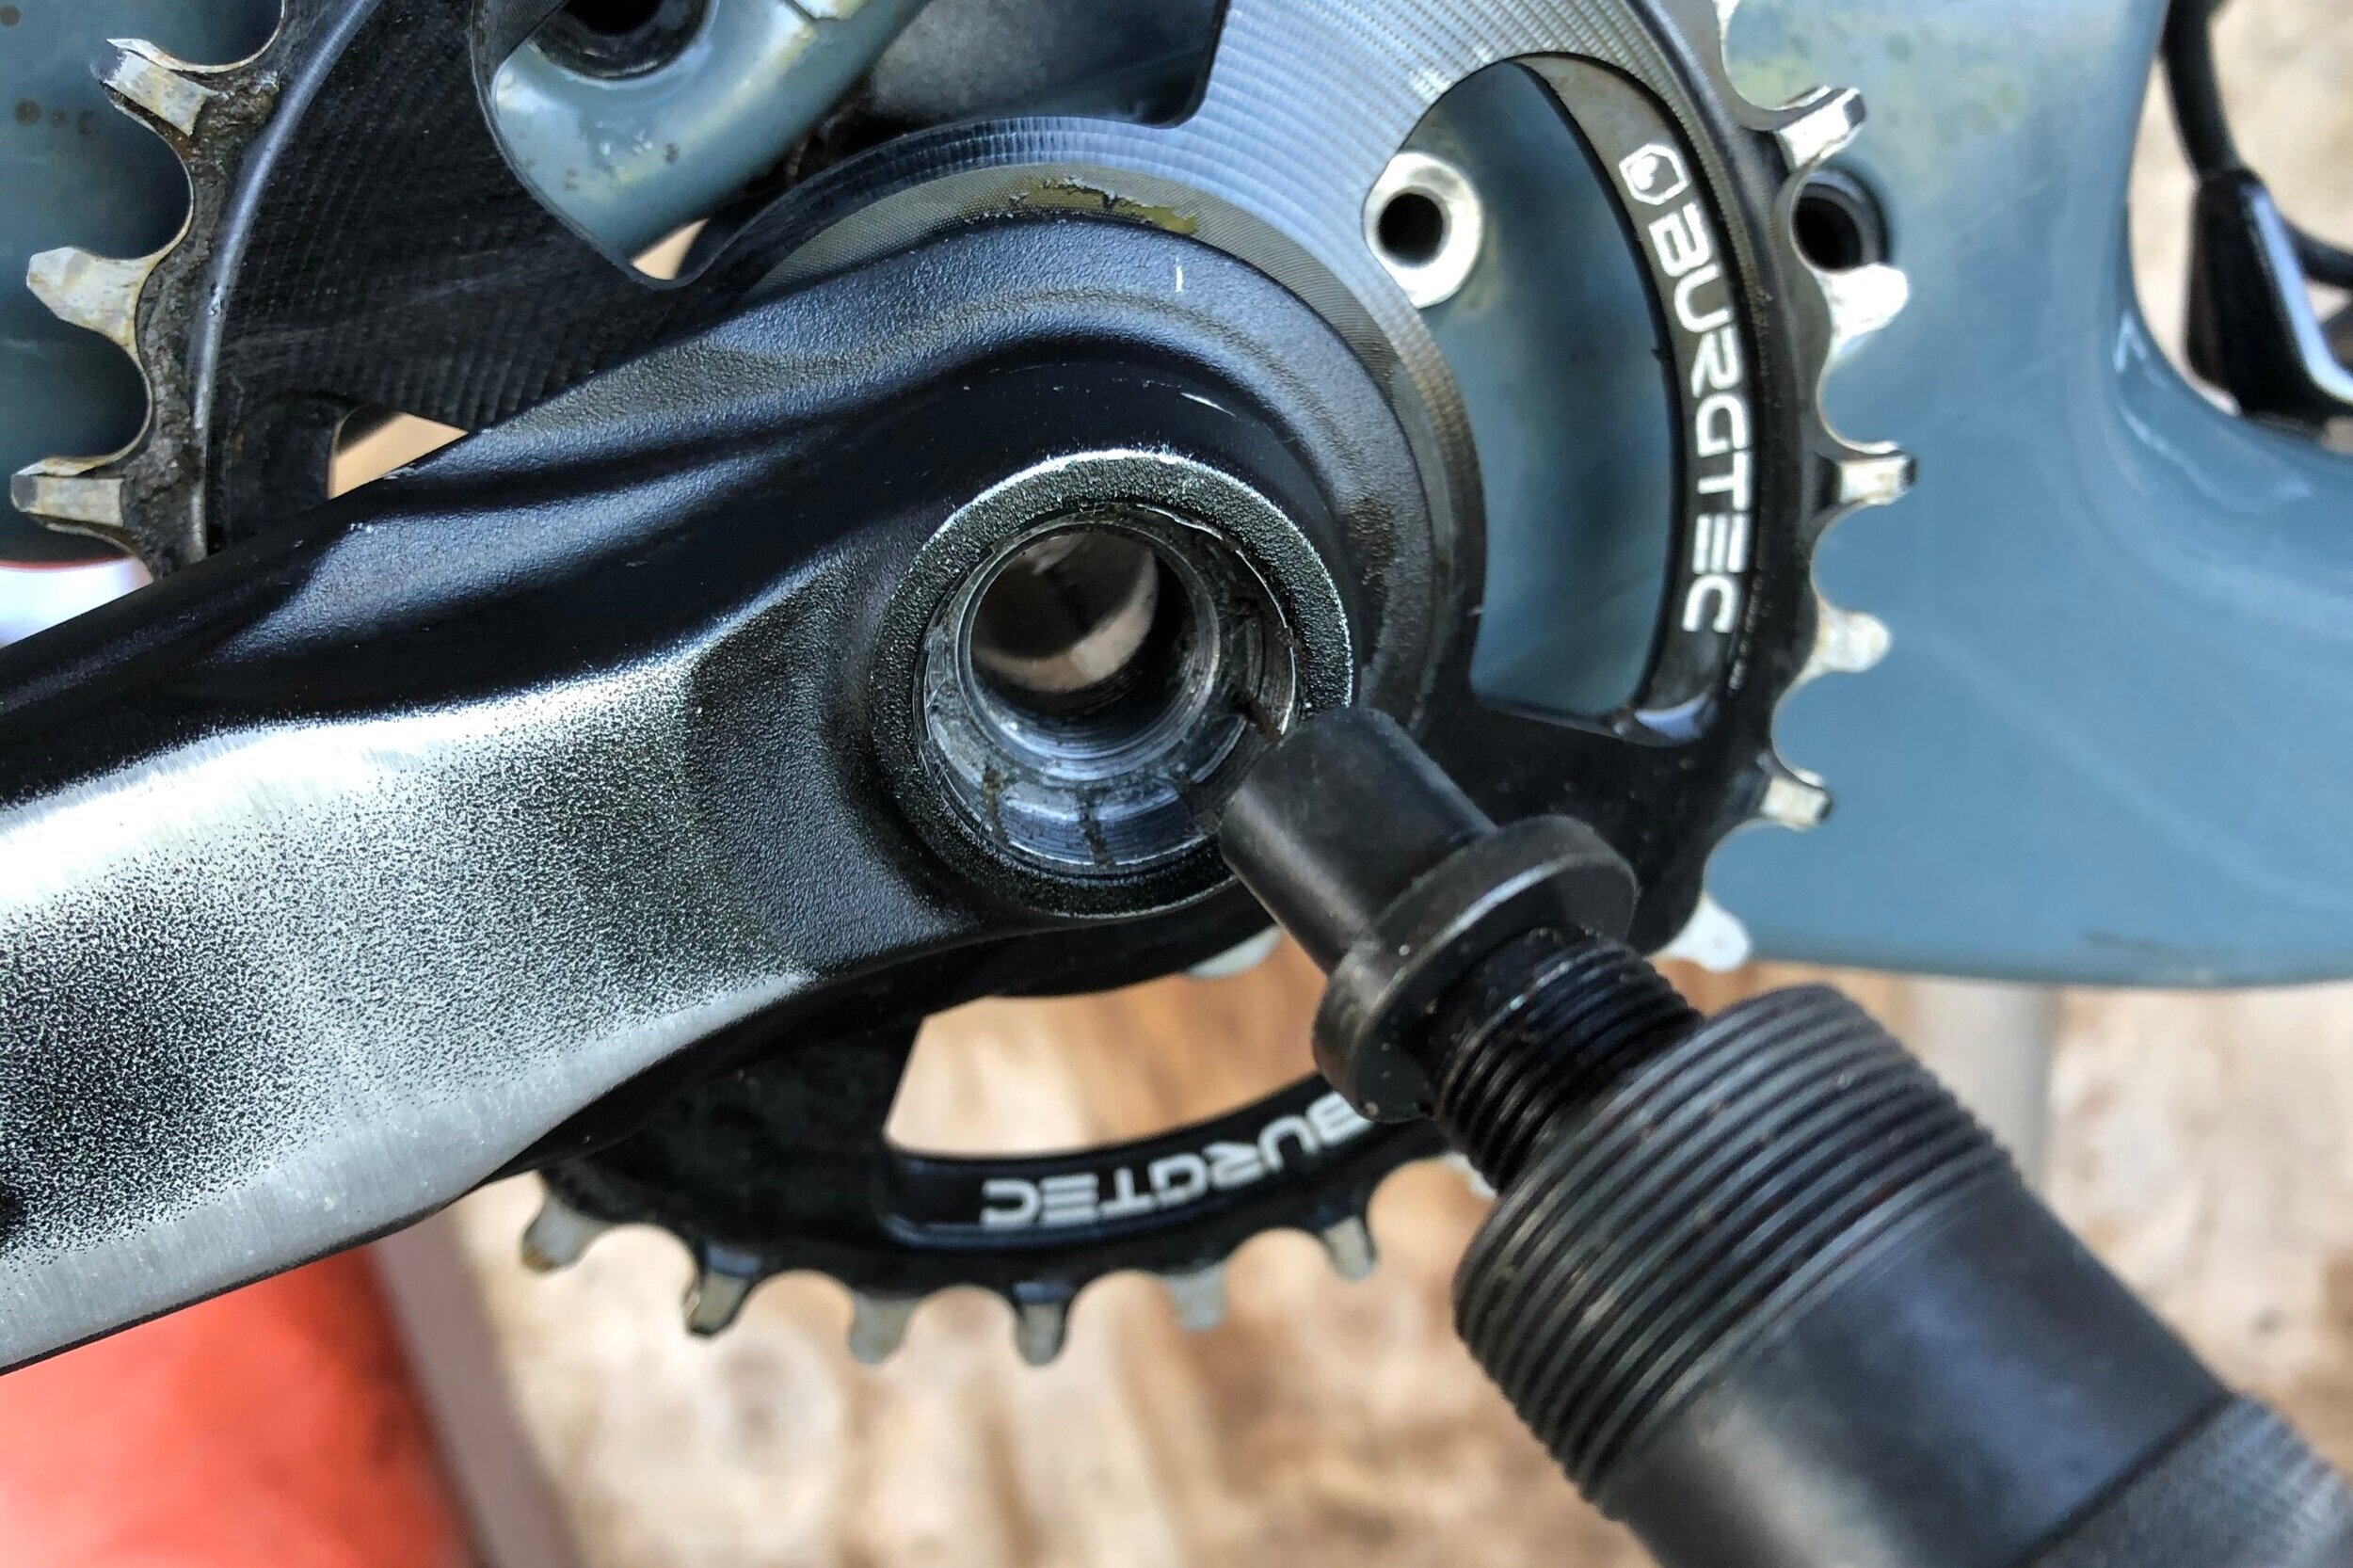
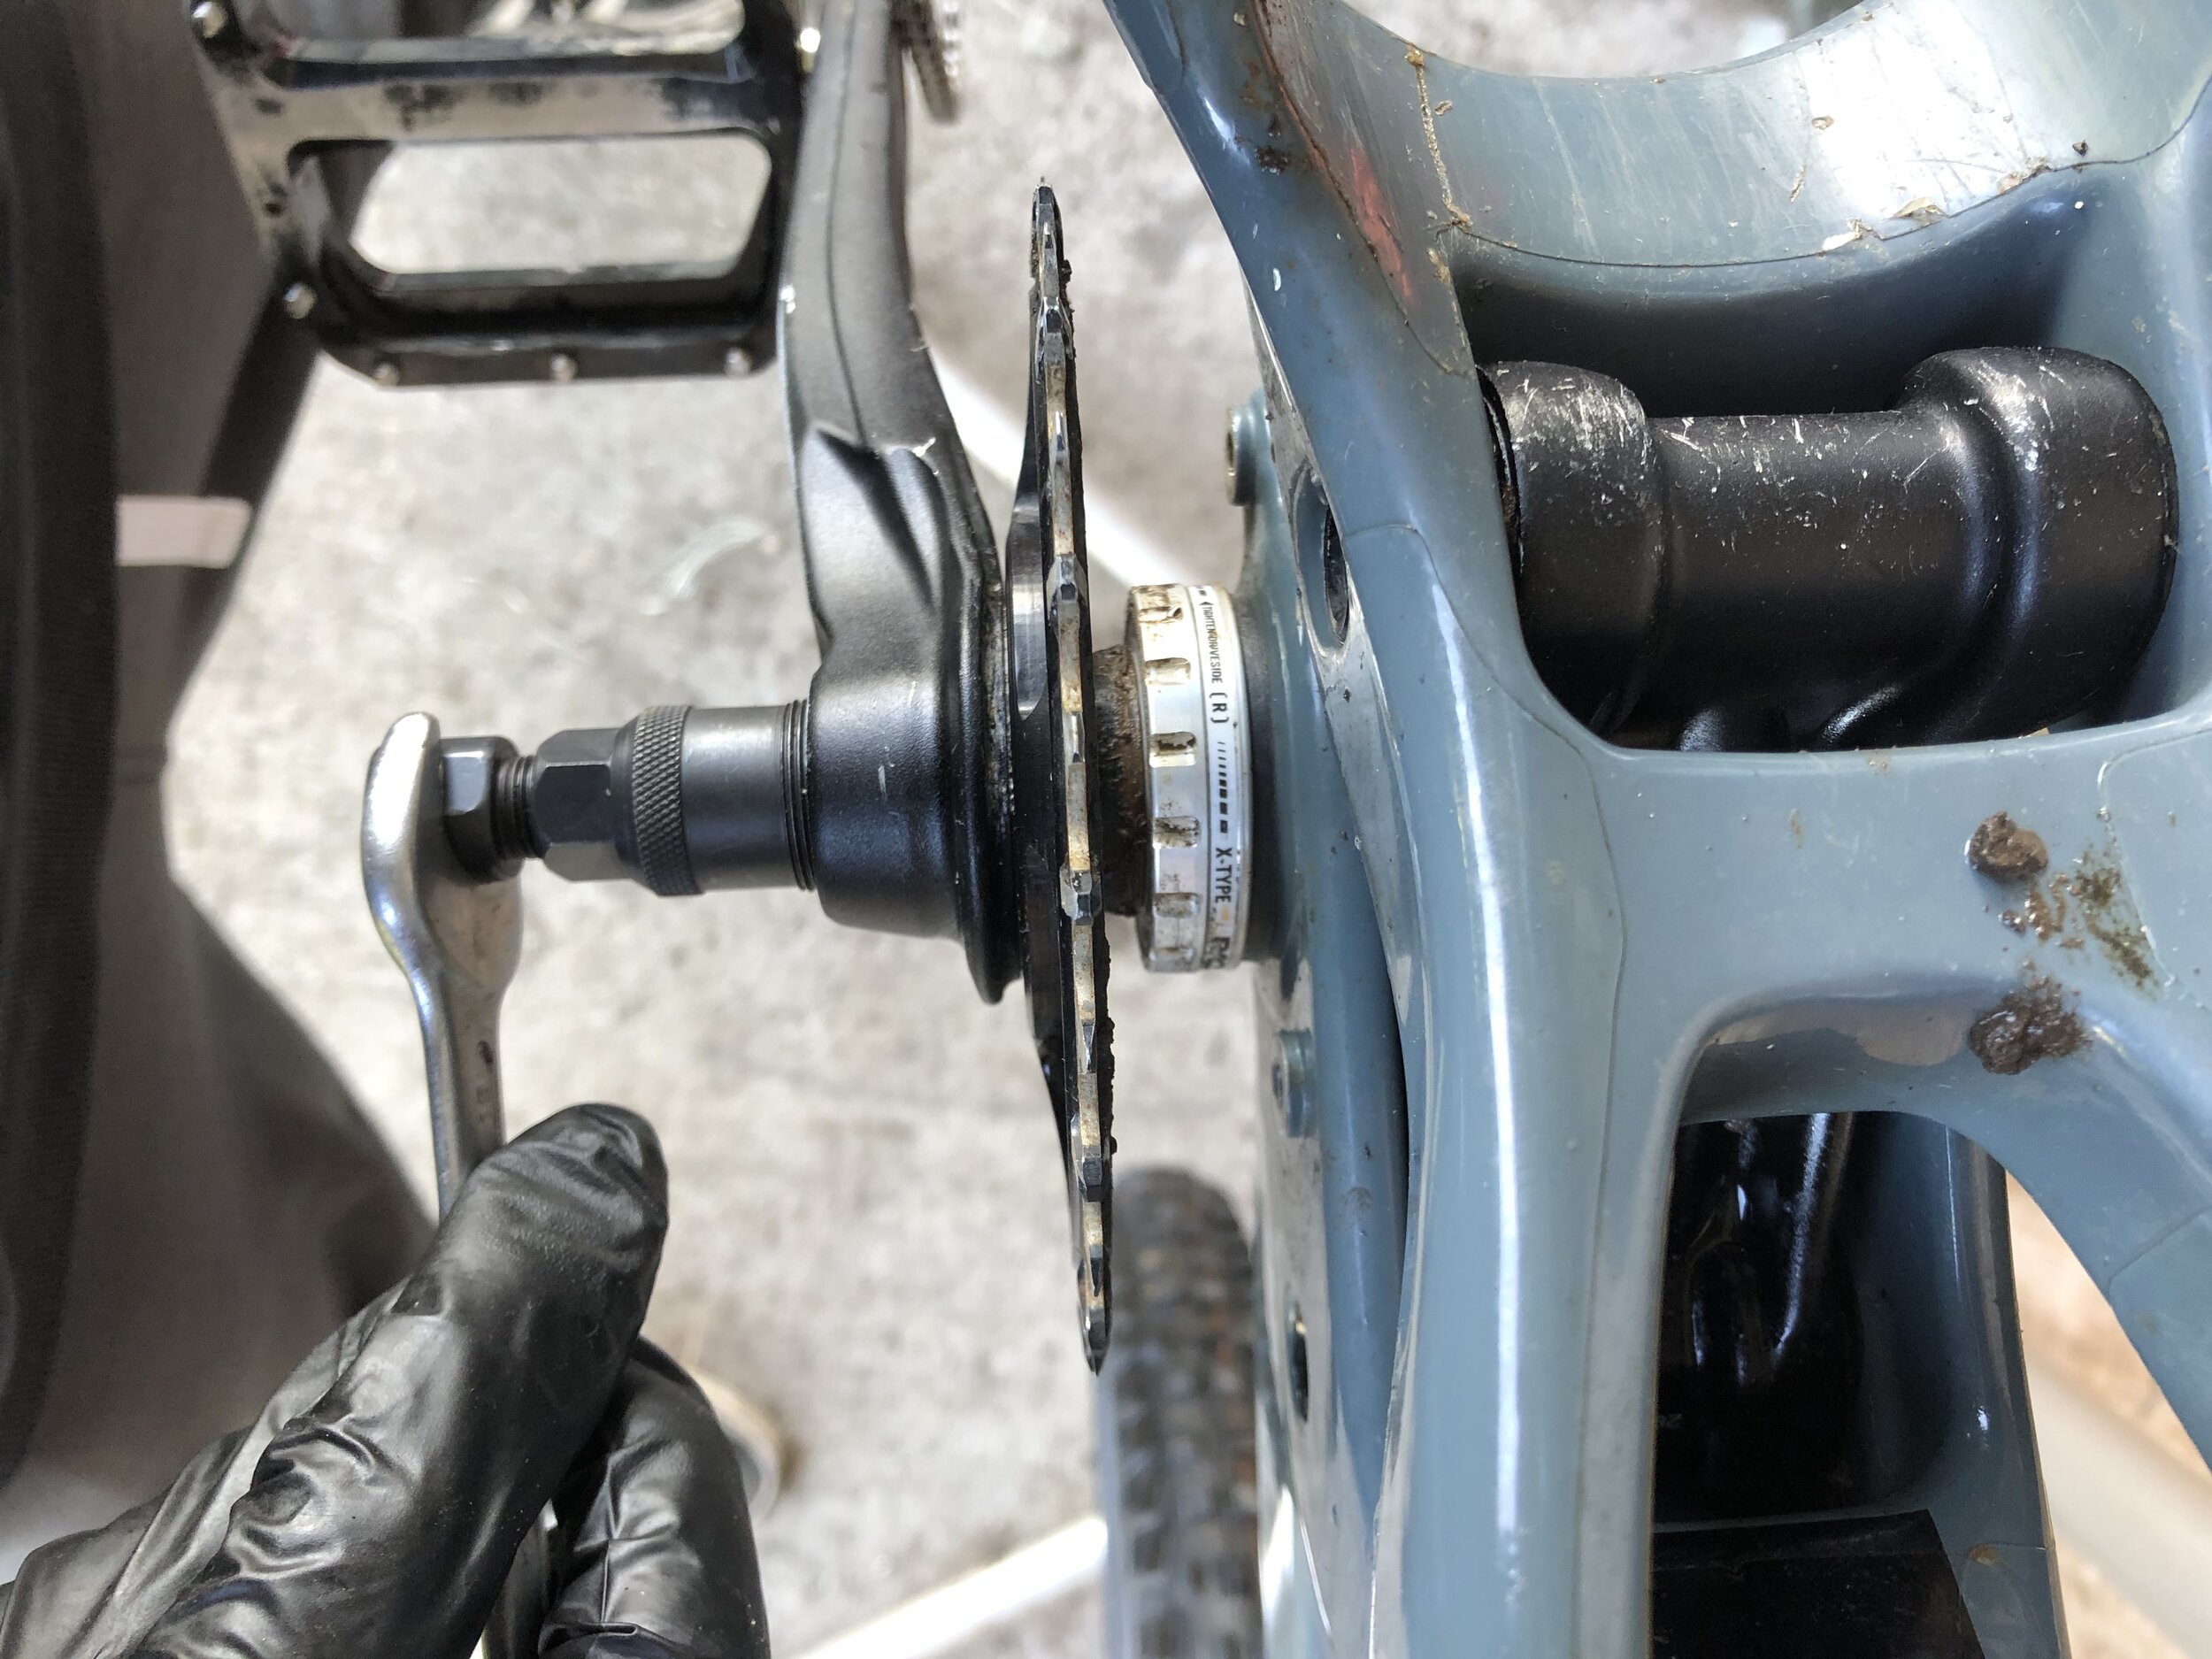
A self extracting crank is effectively a bolt on top of a bolt (often with an opposite thread). So you undo the inner bolt, it hits the outer bolt, it can’t move, so pulls the cranks off from the axle. If this self extractor nut rattles loose and falls out it makes removing your cranks a lot harder than it needs to be or you’ll have to buy a new crank bolt kit…. Usually at a fairly high price for what it is.
I come across this quite regularly when servicing bikes, especially on SRAM DUB cranksets, so I thought I would give you some advice as to how to prevent it happening to you. More often than not I just find them loose but still in the crank but worth checking yours!
The next time you are giving your bike a check over or having a mechanic service it, ask them to check this bolt and apply some more loctite if it’s loose. It is a very simple task as you can see and might save you a headache later.
You will usually need a pin spanner or a 10 - 12mm Allen key to tighten the bolt and it will often be an opposite thread. apply a bit of pressure If yours is tight probably best to leave it be but keep an eye on it regularly.
How to maintain tighten and reapply lactate to a self extracting SRAM DUB crank bolt.
Brand New 2021 Nukeproof Mega Carbon 290 Custom Bike Build
This is my new bike and it has been some months in the making! Availability of parts is one thing but the build has also had to fit in around a busy work schedule, of course our loyal customers have had to come first.
But now it is fully built up, here is a look over of my brand new 2021 Nukeproof Mega enduro bike with details on which parts I have chosen and why along with some of my suspension set up.
So looks pretty cool right?! I am not really one for colour matching each component and bright anodised parts but I quite like the stealth look VS the silver components and spokes. Also the fact the Grey forks kind of match the frame was an unintended bonus as I actually thought the frame would be blue. More on the bike..
The frame is a full carbon Nukeproof Mega in size Large with 29” wheels and 160mm of rear suspension travel. I am 6’2 exactly and according to Nukeproof should actually fit slightly better onto the new XL size that the now do the Mega in. The geometry numbers of this frame however slightly better matched my old frame (an older Nukeproof Mega in large) so I was reluctant to massively upsize when I felt comfortable on the old frame. Yes this is a slight downsize in the grand scheme of things but the way bikes are getting bigger and bigger and most enduro tracks are still quite tight and technical on the whole, I decided a slightly smaller build would be more appropriate especially for the mostly steep and technical riding that I do.
Suspension forks… I have always been a fan of Rockshox Suspension for no particular reason other than I prefer it over Fox and most other brands I have used. The new ZEB for was the obvious choice for me and it is a bit cheaper than the Fox alternative also they look really cool.
This bike is designed to run with a 170mm fork upfront, however I decided to add 10mm and I run the ZEB in 180mm of travel. I have always been a Downhill rider and it pains me a little bit to not own a DH bike so bulking up my enduro bike seems to be the best alternative to me… Perhaps I should have gone for the Nukeproof Giga which has even more travel?? Either way I didn’t and now it is too late.
I am actually yet to take my own geometry readings to see how this longer fork messes with the bike’s numbers but I can confirm it does feel pretty good to ride.
Currently I run 83PSI in the fork with 2 volume spacers and 5 clicks of Low Speed Compression. The fork feels really supple but I have a feeling I will increase the air pressure once I have ridden it on some gnarlier tracks as I think it will ‘dive’ too much in steep turns etc.
While we are on the topic of suspension here is a bit about my rear shock… I run the Rockshox Super Deluxe Ultimate with the Megneg Aircan Upgrade. This shock has been taken from my old bike because I loved it so much so it is actually a year old now. I have serviced and fully rebuilt it for this bike and only slightly changed the settings from the previous bike.
I weigh 82KG and run the shock with 213PSI which runs at around 27% sag on this frame. I run the Megneg air can which allows you to further tune the negative spring of the shock, basically this means you can fine tune how the shock progresses through its travel to get it to feel nice and supple at the start of its movement, a little bit like a coil shock. I currently run 2 bands in the Megneg air can and I do not run any volume reduction spacers in the shock along with 4 clicks of low speed compression.
Drivetrain… The seemingly life long debate for any cyclist of which is better, SRAM or Shimano? Well I can’t really answer that but I can say I personally prefer SRAM as it looks better and in my opinion works better all be it this is up for debate in the long term.
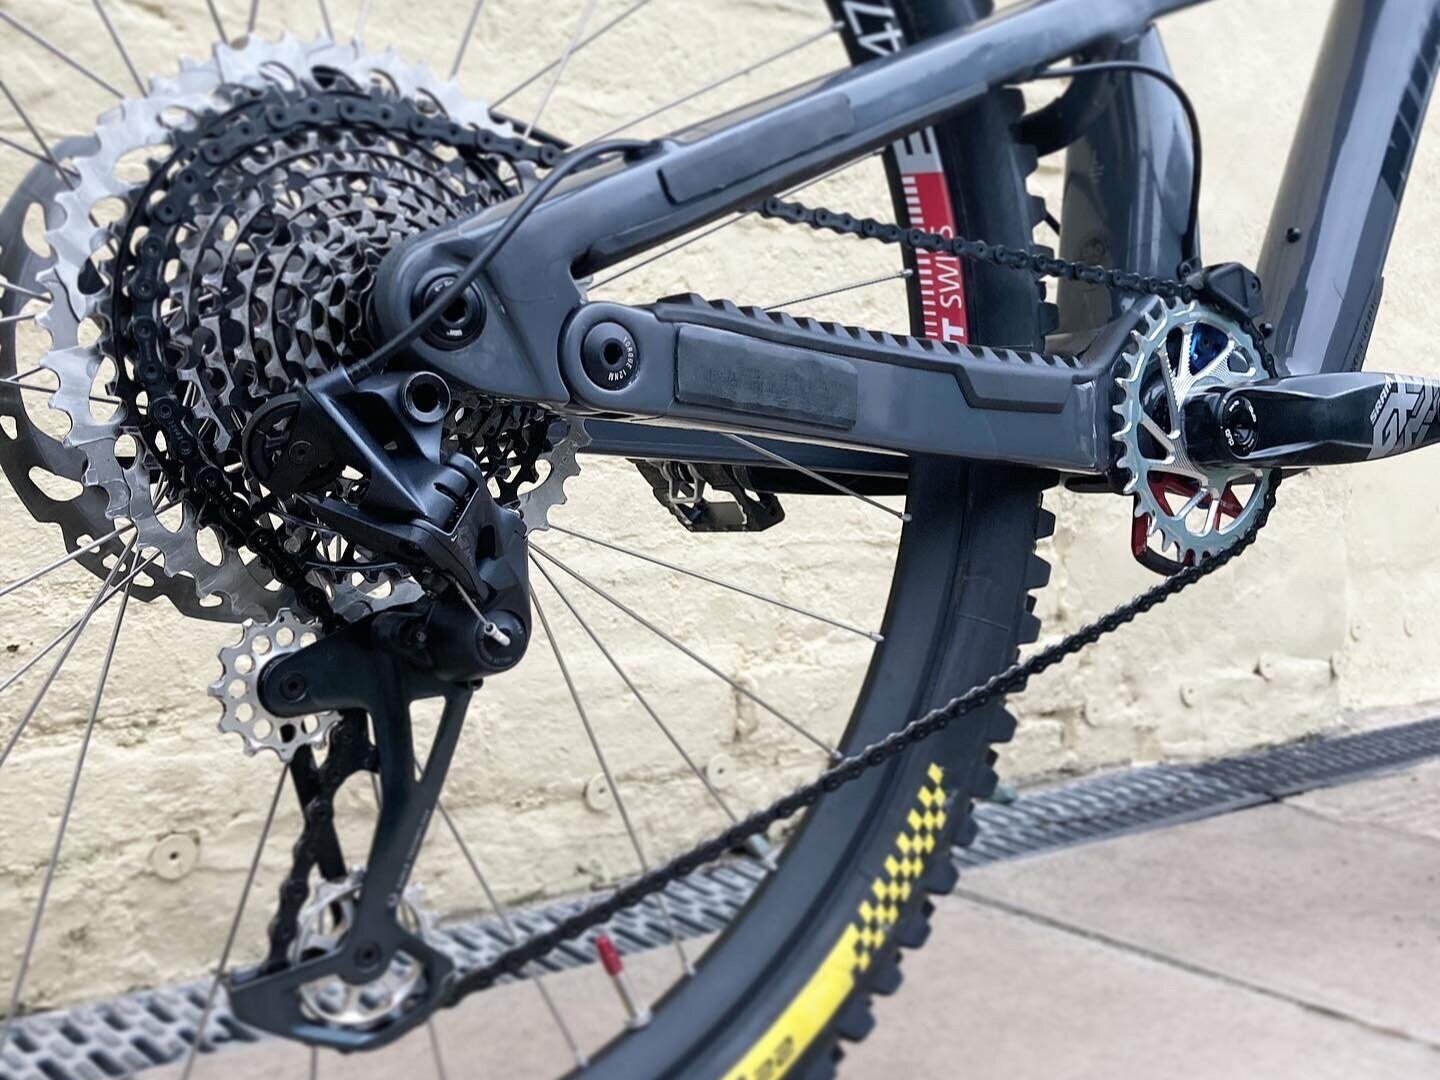
I run a 12speed Eagle set up with a SRAM GX rear mech (which may change very soon to the wireless upgrade) an X01 Cassette and XX1 chain in black. EDIT - I can confirm I have now upgraded to the GX AXS mech and shifter! As you can see I have upgraded the jockey wheels to aluminium wheels along with a matchy matchy Silver Unite Components 32t front chainring. I also use a Unite Components chain device to keep weight down and secure the chain on bumpy trails.
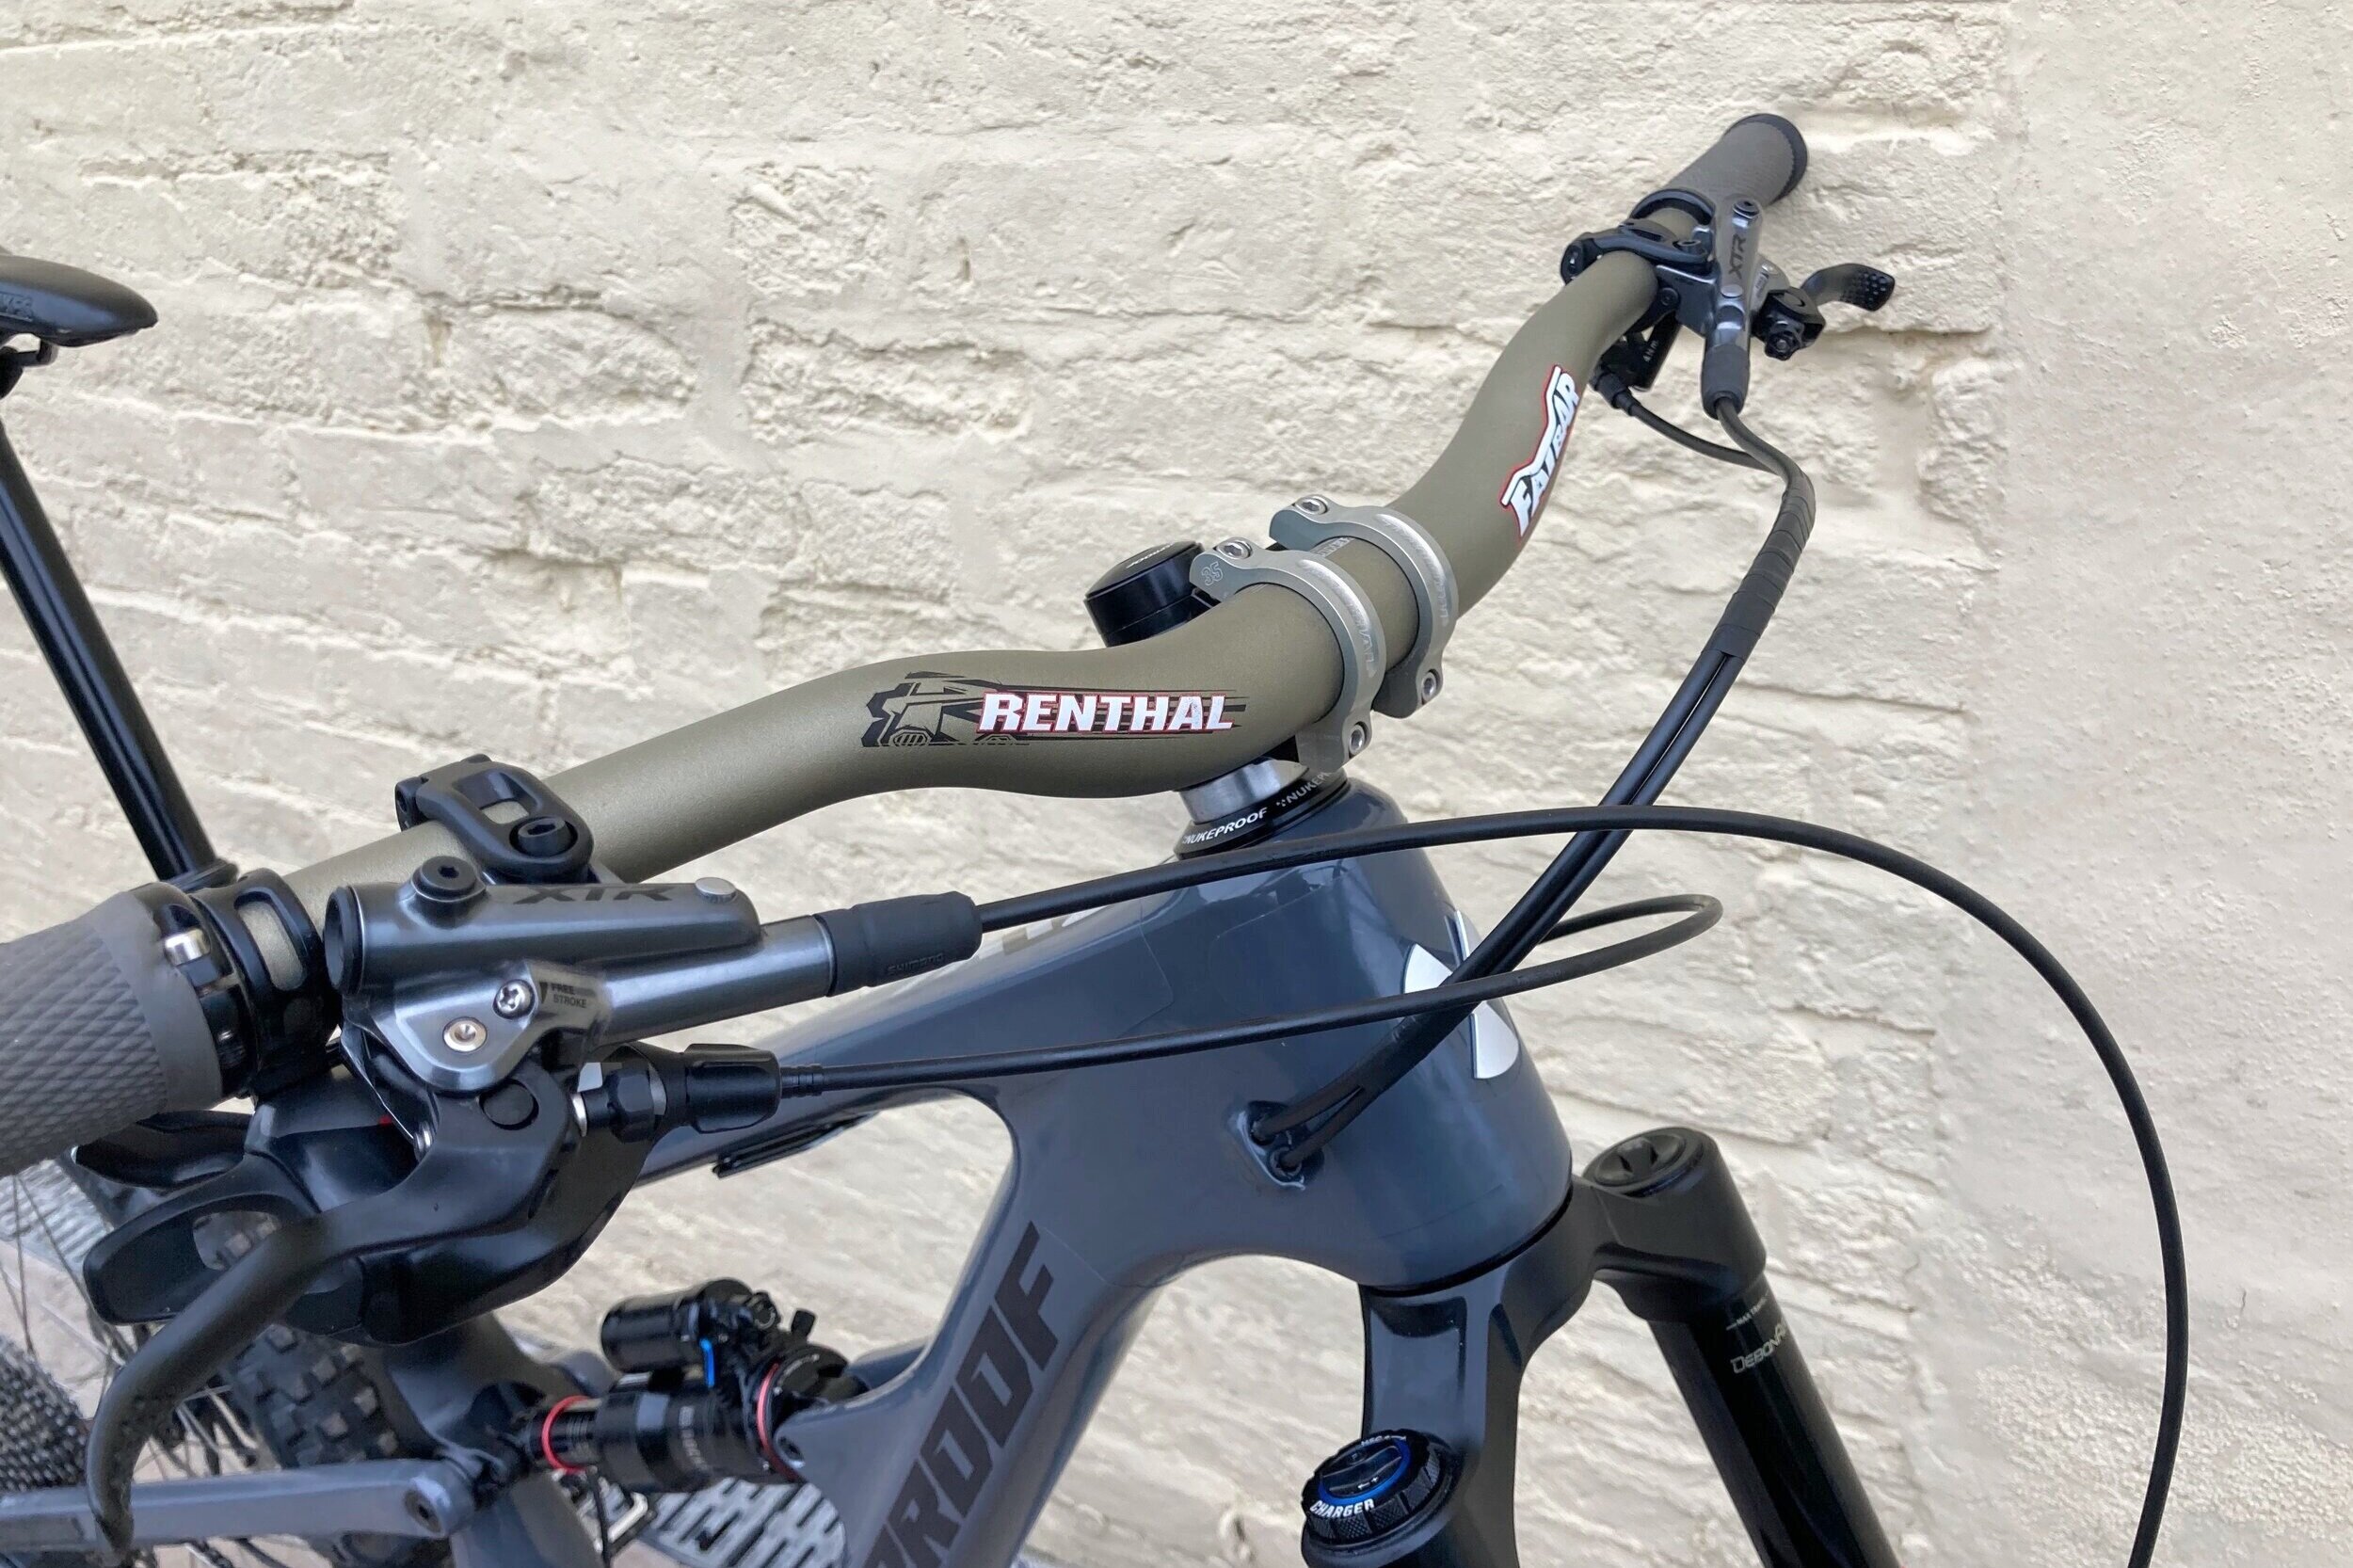
While these bars don’t really match anything else on the bike, If you get Renthal handlebars you have to get them in the classic gold colour way! I am not a fan of carbon, believe it or not, so I choose Renthal 35mm clamp Fatbars with a 30mm rise and cut to 770mm. These are paired with a 50mm Renthal Apex stem to increase the reach that bit more.
The brakes were a slightly tougher decision between SRAM and Shimano. I really like both and power wise there is not really a lot in it. In the end I went for Shimano XTR brakes simply because I already had some matching Shimano XT rotors in 203mm. I have also become quite used the feel of Shimano brake levers which to me is the most important thing. I think that once you get used to how a brake works and feels it will perform better for you than something else even if on paper the other brakes are better… If that makes sense?!
I love these wheels! These are hand built DT Swiss 240 Hubs and DT EX471 DH Rims. I have laced the wheels with silver Sapim Race spokes because I have always had the best results with Sapim and I just think silver spokes look better! The rear is a 32h 3 cross while the front wheel is 28h. Again using a 3 cross pattern but 4 less spokes. Some say to save weight but this may also be because the 32h front hub was not available for ages!
As I previously said, I am not the biggest fan of carbon, so I prefer a tough aluminium rim that is easily replaceable should the worst happen. I run these with Michelin DH22 tires 24psi front and 27psi rear. They are really heavy and draggy but I love the compound, they seem to grip well in all conditions and they also have a really tough sidewall so no cuts or flats so far! They are of course set up tubeless.
Finally the dropper. Probably the least flashy bit of kit on the whole bike, a Brand X Ascend 200mm cable actuated dropper seat post. While relatively cheap and cheerful, I have always chosen the Brand X post. This is because you more than get your moneys worth. It is not an over engineered design like many others and very easily serviced. I have run this exact post for nearly 2 years and it is as good as the day I fitted it all be it with a few new cables along the way.
Thanks for taking the time to read the bike check. If there is anything else you would like to know feel free to drop us a message.
How To Hold a Carbon Bike In a Bike Stand | Bike Hack
There are some horror stories out there of clamping bike frames in a bike stand only to crack or dent the tubing of the frame, effectively killing your bike. I have actually witnessed this happen to a customer’s bike when working in a well known bike shop (no it wasn’t me that did it!).
As bicycles, road bikes in particular, adopt carbon fibre frames and seat posts as standard, in addition to looking so aerodynamic that they look more like spaceships… Clamping the bike via the seat post in a conventional bike stand can prove quite tricky.
Of course a traditional post can be clamped safely in a bike stand, carbon or not, providing care is taken to ensure that there is not too much force applied. But what happens when you want to hold your super aero or carbon fibre frame safely to carry our maintenance without the risk or any damage occurring? We have a very cheap and easy trick to solve this problem and it is as simple a an old set of road bike handle bars with some bar tape applied. You simply clamp the old handle bars in the bike stand positioned so that they form 2 hooks for the bike. The bar tape will protect from any scratches and ensure that you do not risk damaging your bike with the stand.
How To Use A Bicycle Crank Extractor Tool | Simple Maintenance
Ever wondered how to take your cranks off, but you undo the bolt and nothing happens? You need to use a crank extractor! Here is our simple guide showing you how to remove your bicycle cranks using an extractor. Most older road and mountain bikes use cranks like this and a lot of Raceface cranks also use this system.
You Will Need For Removing Your Cranks:
Crank extractor tool - Ice Toolz make a good, cheap one
Spanner 15mm
Allen Keys
Sometimes a socket is required on older cranks
Firstly remove the crank arm retaining bolt. This is usually an 8mm allen or in some cases a 13 - 14mm socket.
Now inspect inside the crank and spindle. Offer up your tool to ensure that you are pressing against the spindle and not the crank you are trying to remove as this will cause damage to the crank. Notice how my tool has a hardened, shaped end to exactly fit into the crank spindle
Now fully unwind your extractor tool and thread the tool into the crank arm, nipping it up with your spanner. Make sure that the tools is threaded in with sufficient thread or you can risk stripping it out of the crank.
Now start to tighten the tool up to ‘pull’ the crank arm off of the spindle. This will sometimes require a bit of force but if it is extremely stiff it is likely that you have not aligned the tool properly. If so stop there and remove the tool and re evaluate the surface you are pressing against.
You should start to notice the crank moving away from the frame… Success!
How To Service Bike Pedals
While pedals are built pretty tough, regularly stripping the axle out and re greasing the bushings can dramatically increase the life of your pedals, especially as they are in the brunt of the mud on bike rides this time of year.
Servicing bike pedals is not often something particularly high up on the to do list! This is probably because stiff or crunchy pedals are not as easy to notice as say wheel bearing wear for example. While pedals are built pretty tough, regularly stripping the axle out and re greasing the bushings can dramatically increase the life of your pedals, especially as they are in the brunt of the mud on bike rides this time of year.
Now, not all bicycle pedals are serviceable. Most pedals of any quality usually are though and follow the same, if not a very similar, process to the one we show on the Funn Ripper SPD pedals.
What You Need To Service Your Bike Pedals:
Socket set
Allen keys
Rag & tissues
Spray oil
Grease
Emery paper - Optional
Stripping down your pedals
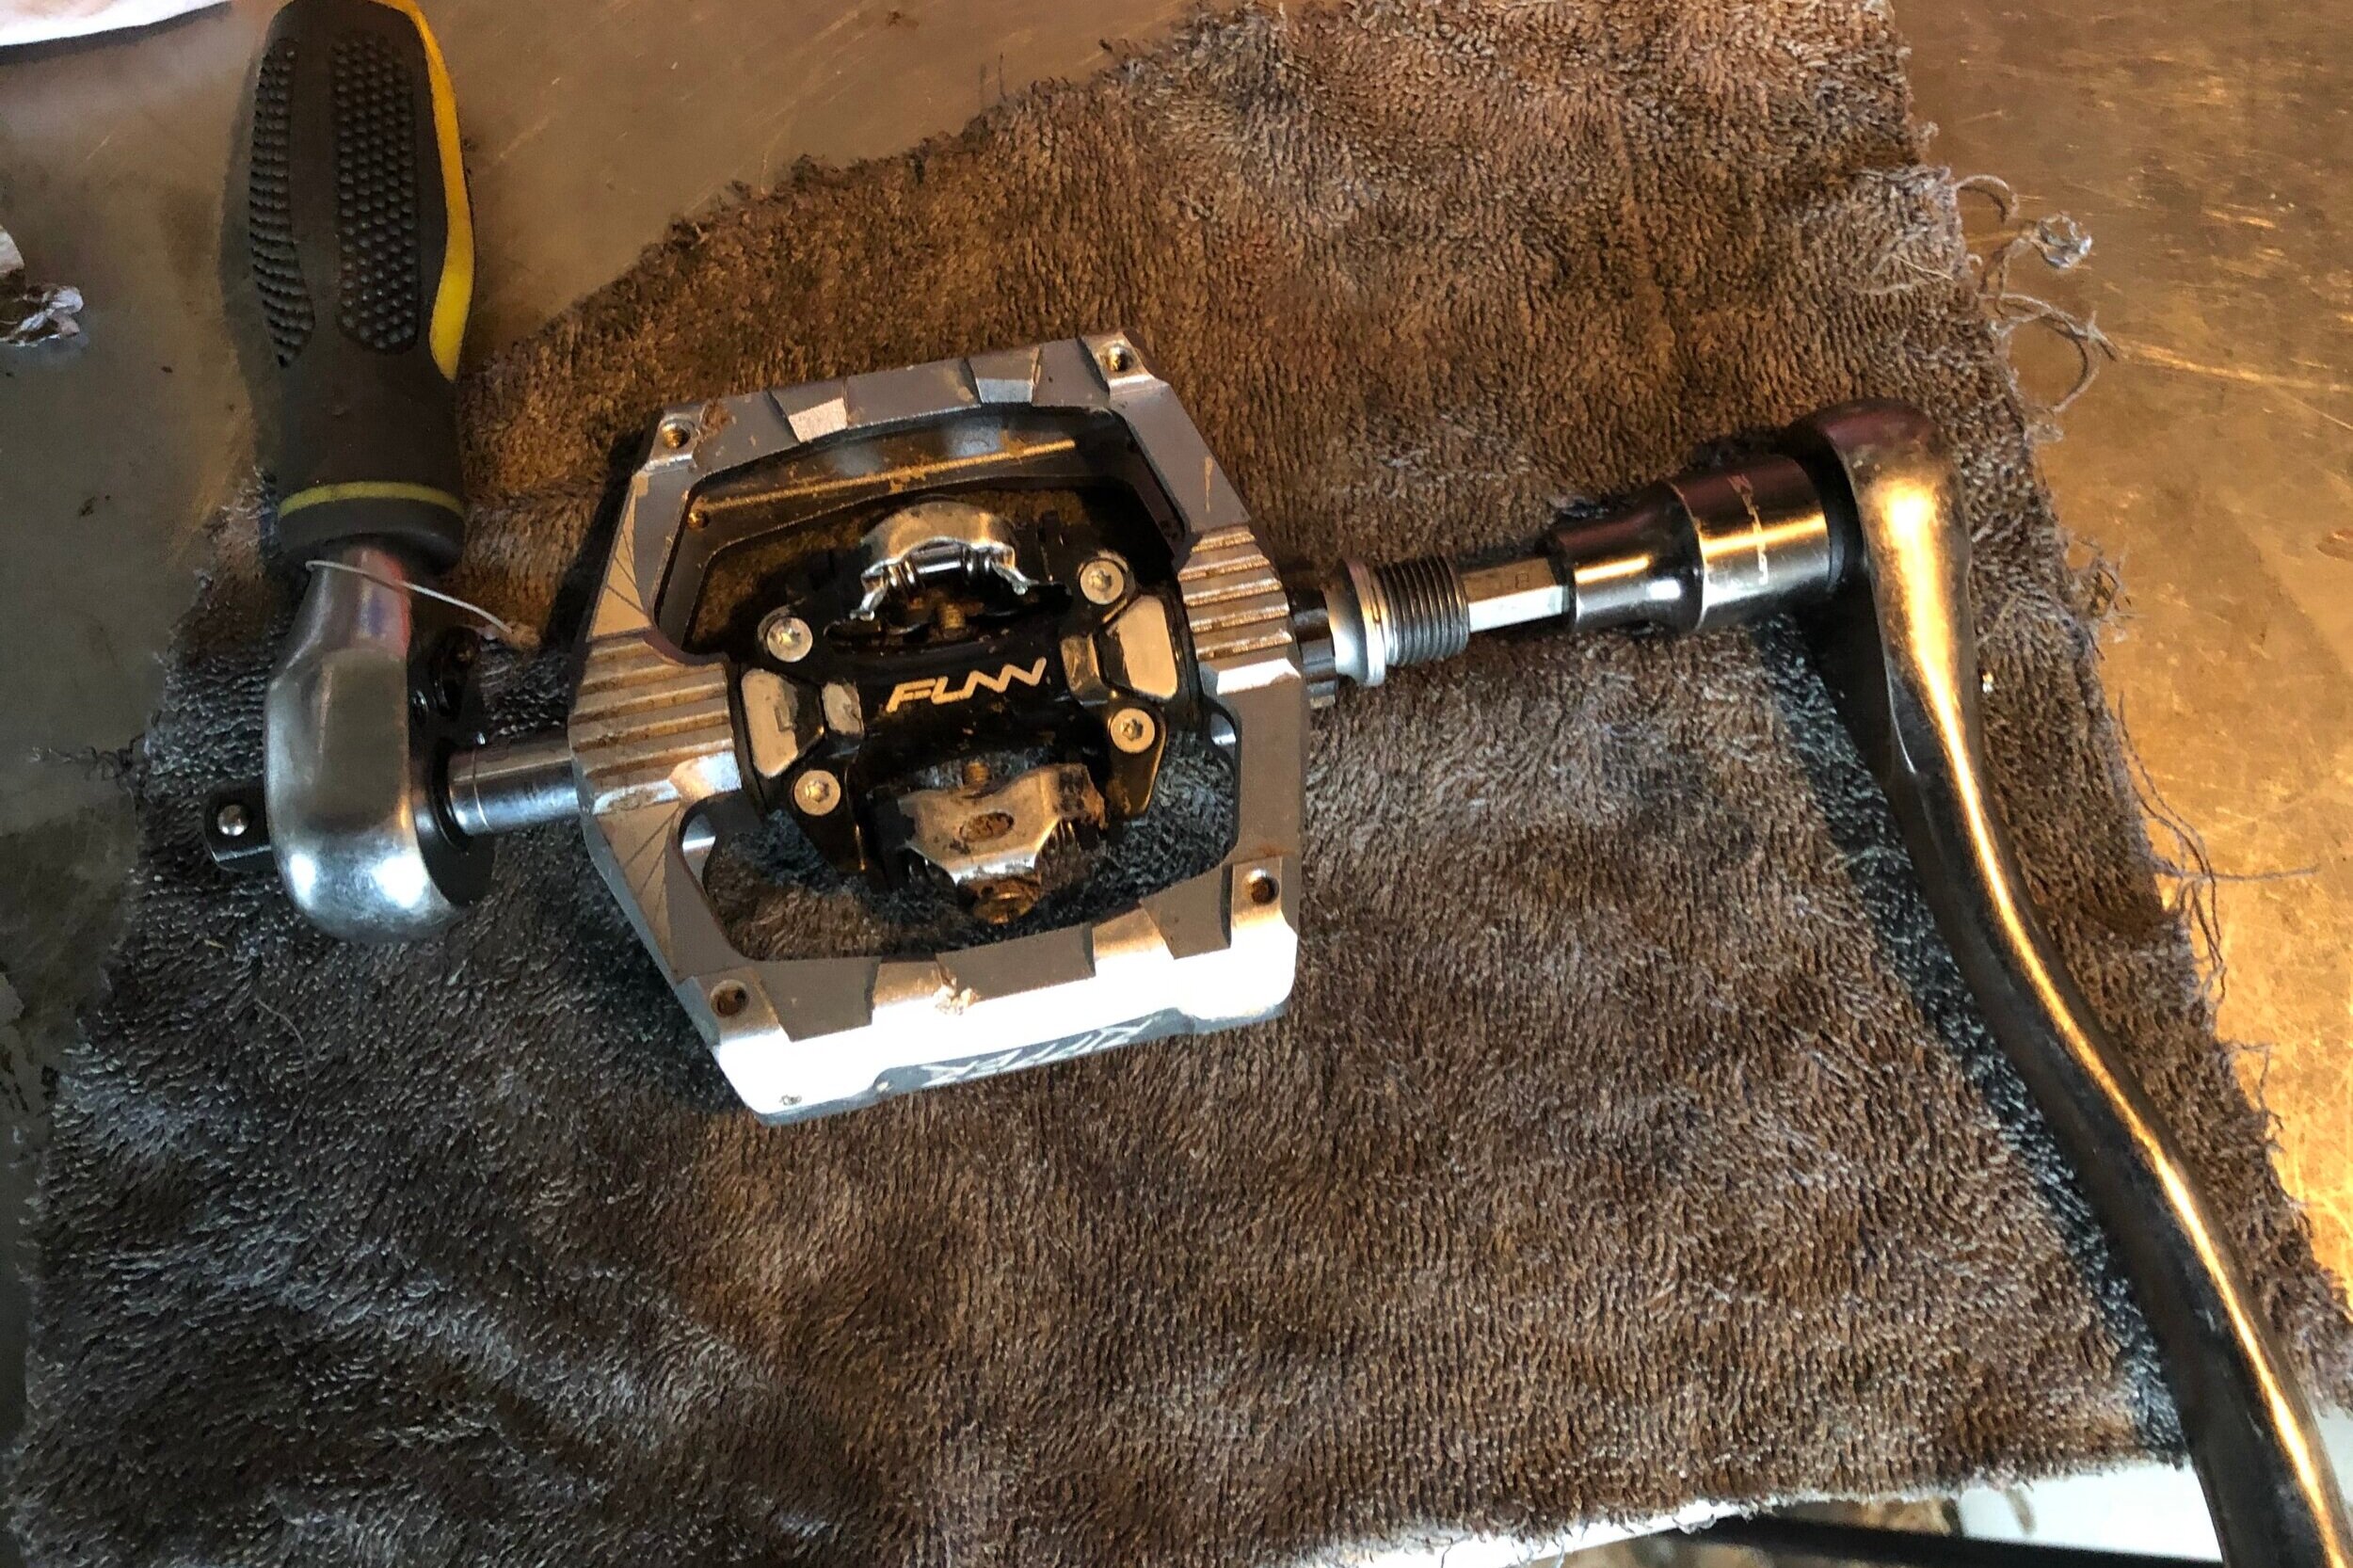
Firstly remove your pedals from your bike. Remember the left hand (non drive side) pedal has a reverse thread so will loosen when turned clockwise! There is usually an end cap on the outer shell of the pedals, this is to protect from mud. Remove this to expose a smaller nut, pictured here, that holds the axle in to the pedal.
Now holding the axle in place using an 8mm Allen key, undo the smaller nut. Note this nut on the right hand (drive side) pedal may also be reverse thread!
It may be a bit stiff, but with this small nut removed the axle should pull out. As you can see… mine is pretty grim!
Now thoroughly clean out the pedal casing and axle. Spray oil into the pedal and clean by pushing in some tissue or thin cloth.
Now wipe down the pedal axle. You may find some particularly tough grime on the axle like mine in the picture. If this is the case, spray on some oil and rub with a very fine emery paper.
Be careful not to overdo it, simply use the paper to remove the grime, not score the axle!
Now apply grease to the axle and pedal body. I put quite a lot on and any excess is force out the end when you re fit the axle.
Now re fit the axle and tighten the locking nut, again remember the drive side may be reverse thread. Then refit the end cap from the pedal.
Job done! Just got to re fit them to the bike. This is a simple job and it makes a real difference to the resistance of the pedals when spinning on the axles. Some pedals may have slightly different process but generally if they are serviceable pedals it will be very similar to the method described above.
Thanks for reading, feel free to get in contact with any questions.
How I Converted My VW Caddy Into a Bike Van/Camper | Carpeting and Insulation
The VW Caddy van was the starting point for Lost Yak! I needed a van suitable to work out of, but also I wanted something comfortable that I could use for my own biking adventures in my free time. Here I show you my processes in carpeting and insulating my Caddy and try to give a little insight so you don’t make the same mistakes I did when converting your van into a bike ready machine.
The VW Caddy van was the starting point for Lost Yak! I needed a van suitable to work out of, but also I wanted something comfortable that I could use for my own biking adventures in my free time. Here I show you my processes in carpeting and insulating my Caddy and try to give a little insight so you don’t make the same mistakes I did when converting your van into a bike ready machine.
Bare in mind I have written this presuming that my audience will have some DIY knowledge, so if there is anything else not included you want to ask feel free to get in contact.
Before
After
Videos Of My Bike Van Caddy Camper Conversion
Here’s a couple of quick videos showing my processes insulating, ply lining, carpeting and then flooring my VW Caddy, which are further explained below.
You Need For your Van Conversion:
Cleaning equipment - rags, spray, brake cleaner, hoover
Drill
Saw - ideally a Jigsaw
Self taping screws
Plywood sheet
Various types of insulation
Spray adhesive glue
Flooring - rubber mat or similiar
Flathead screw driver or Trim tool
Scissors
Insulation tape
Sharp knife
Details Of What I Used For My Caddy :
Note there are loads products like these out there, Ive had this set up for over a year now and everything I have used has been faultless. A quick google of what I have written below will show these exact products.
Carpet - 5m x 2m of super stretch carpet that included 5 free cans of TrimFix glue - £49.98
Flooring - 2m x 1.5m x 3mm coin pattern rubber flooring matting for car/ garage. - £26.90
Insulation - I used recycled plastic Thermafleece and general purpose Thermawrap bubble sheet.
- My biggest advice here is just ask! Loads of people have left over insulation from housing projects or their own camper vans! I luckily managed to get all of mine for free from a guy I met who had just finished his Transporter camper conversion! Anything else can be purchased at DIY stores.
Plywood - I mostly used 5mm thick to save on weight but went a bit thicker on the rear doors as I wanted to hang some shelving.
Where To Start?
As you can see my VW Caddy came ply lined, although most of it was pretty shocking! I started by stripping everything out, setting aside what I would re use and cleaning behind the panels, I also removed the standard trims on the doors as they can make good templates for new Ply lining. Note I re used the roof panel so make sure thats put somewhere safe! It’s also a good idea to keep the flooring in for now as it will just get dirty while you work on the interior.
To Vapour Seal or to Not Vapour Seal?
Quite simply a vapour barrier is a complete wrap of plastic or the Thermawrap to create a seal between the van body and interior from water vapour. The idea is to prevent condensation building up between the insulation and the metal van exterior. I considered this but decided as it is a small van and I wouldn’t be sleeping in it for really long periods of time it wasn’t worth it as I could run the heaters when driving off the next day.
Once I had stripped everything out and given it a good clean I started by filling big gaps with the recycled plastic insulation. the key is not to stuff too much in as it actually reduces the insulating properties if its too compact. I used a bit of spray glue to hold it in place. Also its worth going easy on the insulation around any wires as if in future you need to get to them you don’t want to be ripping everything out! Then I covered the the filled gaps with the Thermowrap bubble insulation to further reflect heat inwards.
The Caddy roof was a little tricky to insulate, but I used the spray glue to carefully stick sheets of Thermawrap up there, being careful not to interfere with the interior light wiring. As you can see on the right of this picture, I have not used the Thermawrap bubble insulation. This is because I decided to use the bubble wrap insulation on the inner side of the large van plywood panel as opposed to trying to stick it over the recycled plastic, you can see this in first the video above.
Once I was happy with my insulation, I started carpeting the plywood panels and re fitting them. I started with the small van door panels as if it all goes wrong you don’t waste too much carpet etc. I used the stock trims to get a shape for my ply lining and basically just drew around them and cut them out. For the larger ply lining in my caddy, it was really just a case or trial and error. I kept making small changes to the ply and re fitting to get it to sit exactly where I wanted. You can purchase complete Caddy ply lining kits online but these are quite expensive when you are on a budget!
Carpeting the ply wood is actually really easy. You can see exactly how I did it in the videos. But in general I found laying the carpet over the plywood and then sticking one half on with the spray glue then folding it over and sticking the other half was my preferred method. There are loads of guides on Youtube on carpeting the panels so its easy to find what works for you. Note that the carpet does have a ‘show' side and a ‘stick’ side… Basically once side is more fluffy!
Attach the plywood using self taping screws, again because I had the Caddy van with ply lining already in I could reuse some of the holes. Just BE CAREFUL that you are not going to drill through something you really don’t want to, just double check every fixing point.
Sometimes the screws tried to wind the carpet around them and stretch it off the plywood. this only happened a couple of times but I heated the tips of the screws with a lighter to melt through the carpet and make a kind of pilot hole to avoid damage to the carpet.
The picture above shows the rear of the carpeted roof, this was the original roofing panel that came with the van. I have included this as it shows how I had to carefully cut the carpet to allow for the trim clips to re attach it. The trim clips in the VW Caddy are really short which basically means theres not a lot of room for the new carpet, so just bare this in mind and try to keep overlapping carpet to a minimum when working on the roof.
Carpeting My Bike Van Wheel Arch
Next came the most fun part of my bike caddy camper conversion… The carpeting of the bare metal! Prior to the caddy van I was a complete beginner at interior carpeting, I have actually now gone onto carpet another caddy van for someone, but I learnt a lot here!
The main bits of advice here are:
Try to carpet in complete sections as much as possible. This is because it is quite tricky to join separate pieces seamlessly.
Don’t be afraid to un stick and re work the carpet. The carpet will actually stretch a lot and the glue takes a while before its fully gone off so you have considerable time to work the carpet. As you can see here there are a couple of creases in the wheel arch, this was in honesty the hardest bit but I unstuck the carpet after this picture and re worked it, adding a bit more spray glue, to get a proper finish.
Remove seals and rear van door latches! Removing the door seals and rear door latches allows you to simply carpet over everything, then relocate the holes under the carpet, trim off any excess with a sharp knife, then re fit the things to removed for a seamless finish!
Be patient! Ultimately you will have to put up with any mistakes in your van, so theres no harm in taking your time so that everything looks neat and tidy.
Part 2 - Flooring of My Caddy Camper Bike Van
The flooring to me was really important as more often than not I carry wet muddy bikes around. I needed something not only waterproof, but something that could be laid in as one piece so could be easily swept out and cleaned. Hence why I chose the rubber matting, it is easy to shape and is also water proof.
I started by removing the ply and covering the floor with bubble wrap insulation as you can see in the second video. I used the spay adhesive to secure it. Next I rolled out the rubber matting and offered up the flooring ply. Make sure you do this in complete reverse order i.e rubber flooring upside down and flooring upside down, otherwise when you flip it over the right way into the van, it will be the wrong way around. Also note from the picture, I added a little storage flap to the floor in my van. This is the area on the drivers side rear where the floor drops for a step so there could be another side door. I use this area to keep my Jack and tools etc.
Next I drew around the van floor ply with a pencil and just cut out the rubber using scissors. Then Offered it up in the van to ensure everything was correct before gluing it down. Next I secured my floor ply. Now I didn’t want to screw it down, as I did in the video, as it basically means drilling holes in the floor of your van! There are simple ways of securing floor ply without screws i.e glue, but unfortunately my Caddy already had the floor screwed down so I just re used the screw holes… Damage was already done!
You can see from watching the second video above how I glued the flooring. But I basically just used the left over spray adhesive. Its a good idea to cover some of the fresh carpet incase you get a bit excited with the spray glue!
Making my Caddy Extras
Bike Axle Stands
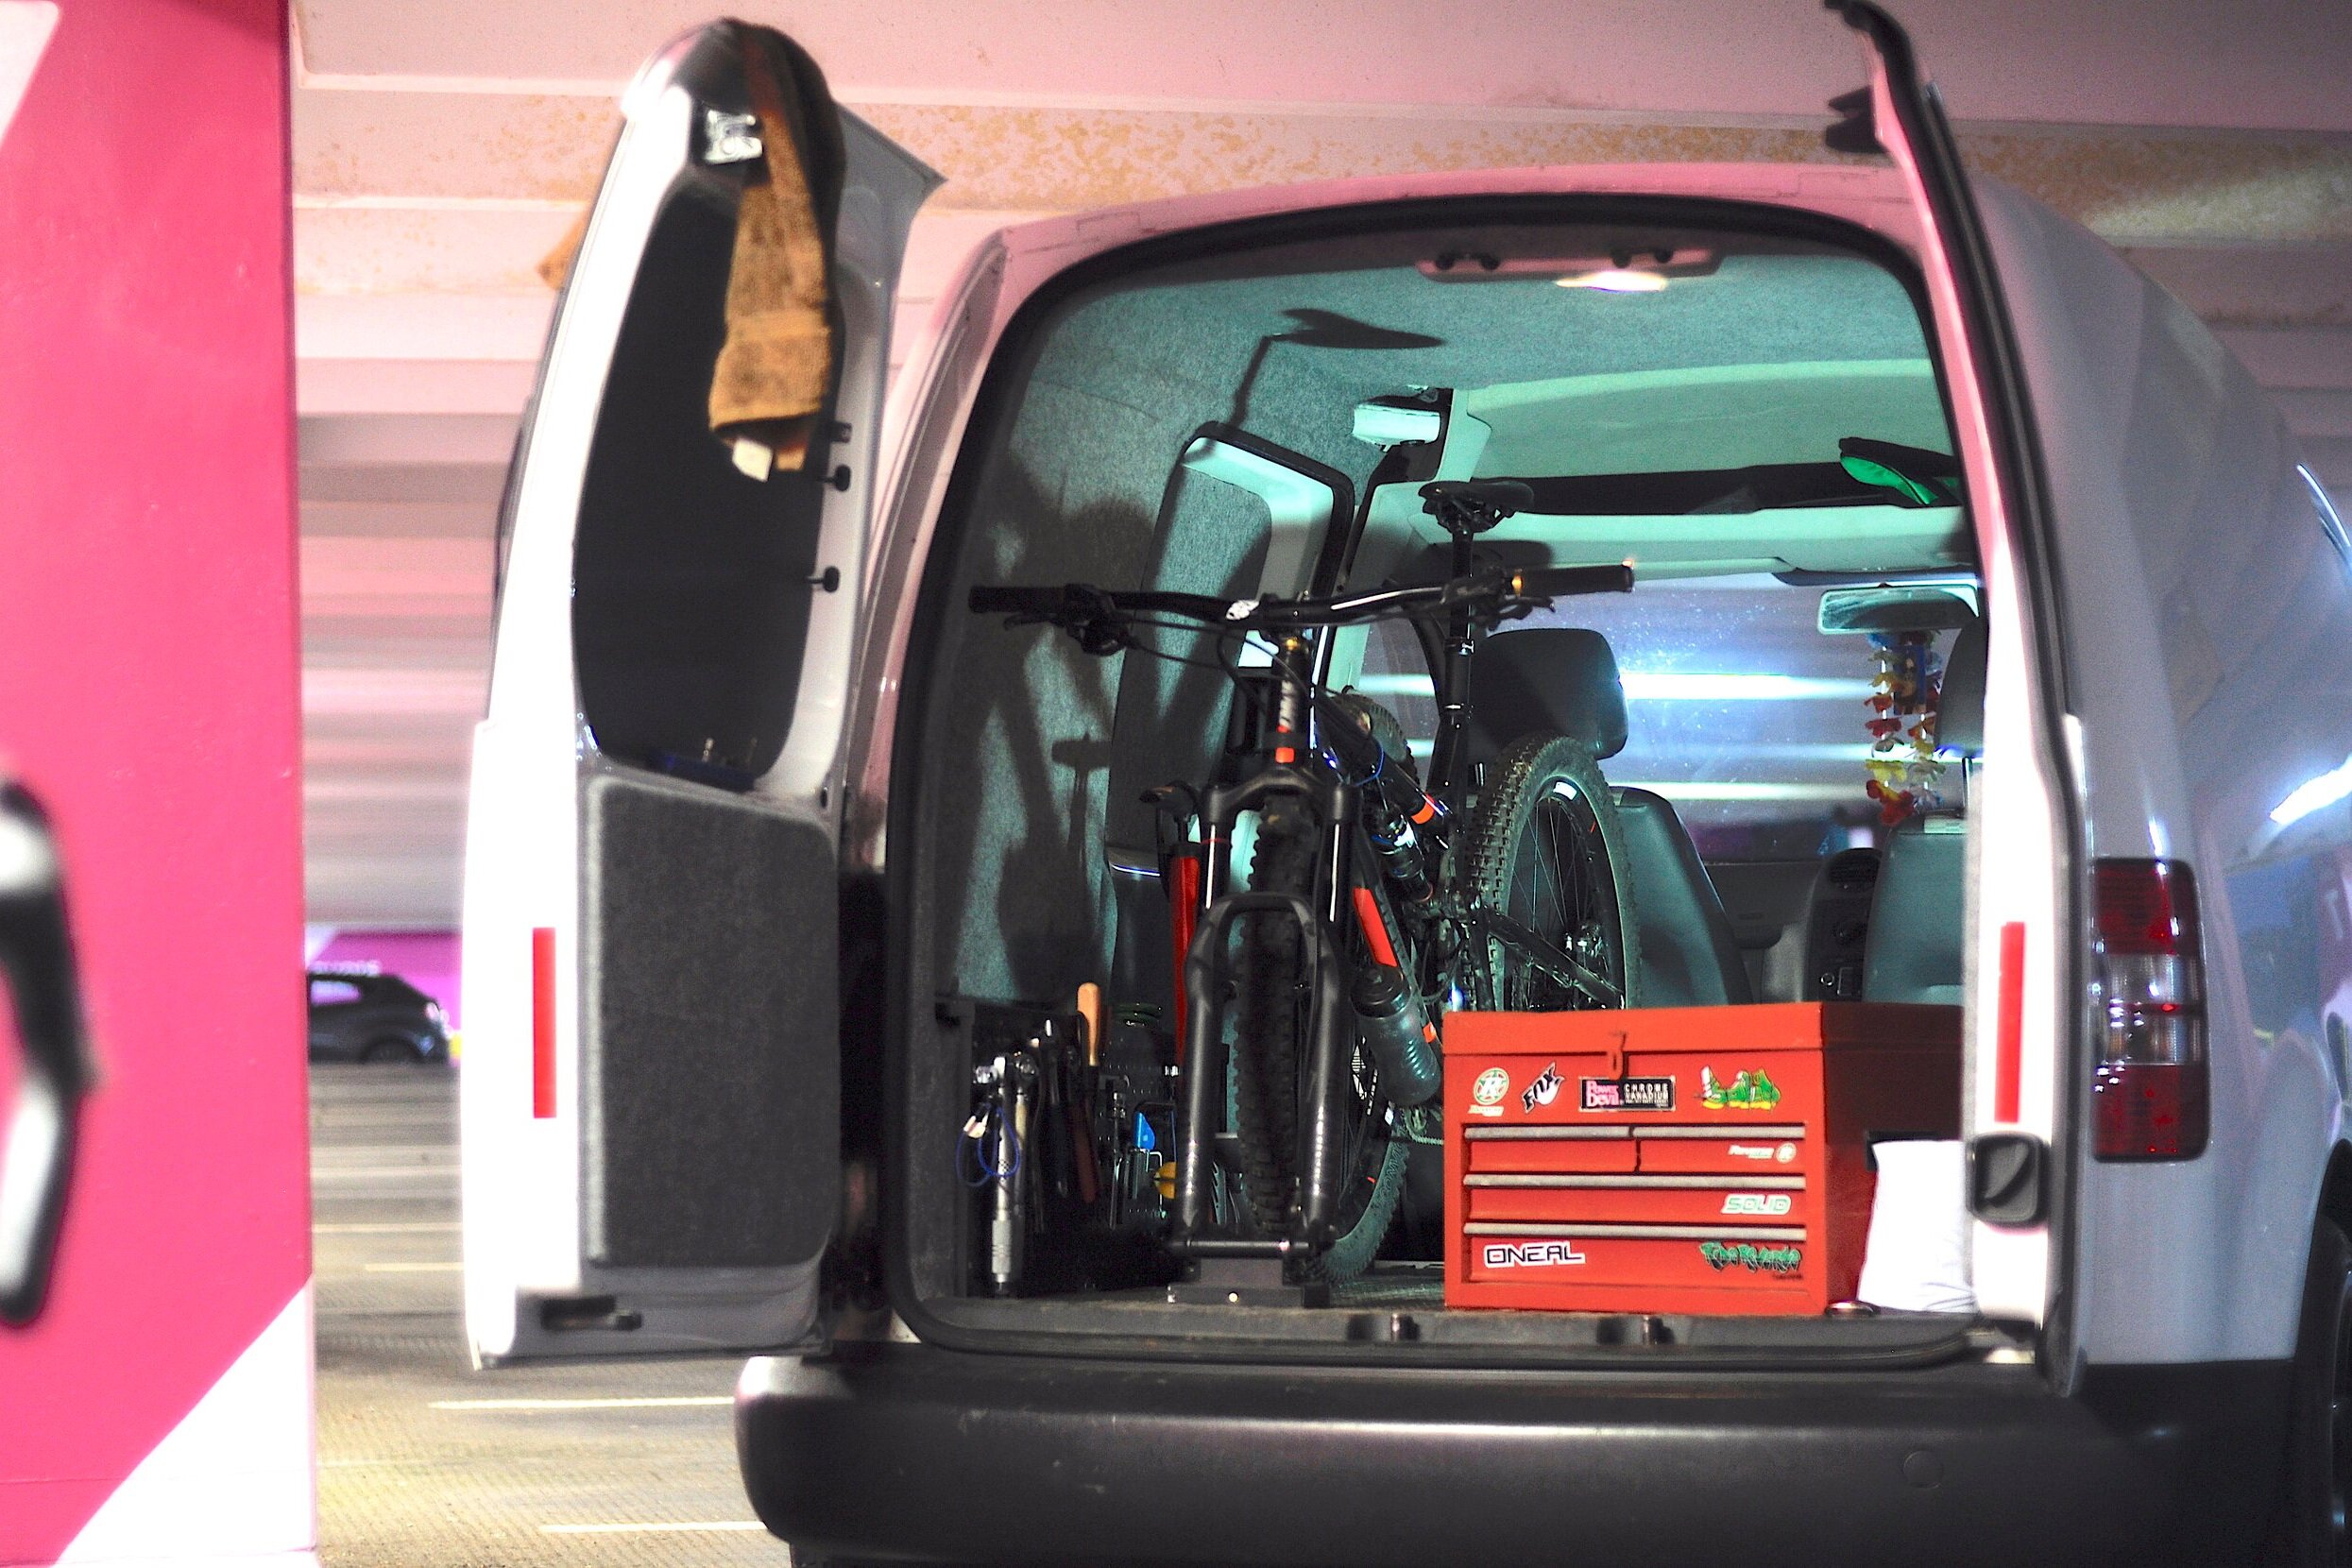
I have used a bike axle stand so I can securely transport bikes in my Caddy by removing the front wheel and using the axle to secure them. I have covered how to make this in another blog entry HERE.
Wheel Arch Box
From the off cuts of ply, I made a box to cover my left hand side wheel arch. I covered the box with the same rubber matting as the floor and finished it with some black plastic trim strips that I found in a DIY shop. This box doubles up as a tool holder with some magnetic tool strips and clamps that I screwed on.
Slide Out Van Bed
So ultimately along with working from the van, I wanted to be able to use it to sleep in while travelling around riding and racing my bike. I used Pinterest to get inspiration for the design but I also had to design it around the things I wanted to store underneath it i.e my tool box and bike washer. In an ideal world the bed would be lower down, but had to compromise with it being a small van. I have travelled to the alps for a month in my van, carrying 2 bikes and sleeping in it everyday… It’s only small but does the trick!
Enduro bike + DH bike and bed away… Slides out to meet DH bike!
Below is a slide show of the progress making my slide out VW Caddy bed. There are so many designs for pull out beds and fold out beds for VW Caddy vans, but I found this to be the system that works best for me. Obviously I have bikes in there so it has to be easy to put up and put away. Note I haven’t actually fixed the bed so it it totally removable from the van! The rubber flooring is quite grippy so it doesn’t move at all while driving even when unloaded.


I have learnt so much from owning my VW Caddy and converting it into the bike / camper that it is today. It has not only been a work van for me but also a hobby! Hopefully this blog gives you some inspiration for your own vanlife project. Thanks for reading please feel free to ask any questions via the contact or social media pages.
DIY Bike Cable Clamps & Routing | Quick Fix
This is a bit of a random bike fix but I have found myself in this situation a couple of times throughout my bike mechanic times so thought I would share this simple cable clamp & cable routing repair. Here we have a bike that had absolutely no gear or brake cable guides left in the frame, nor did I have any to replace them with… Perhaps they wobbled loose or were stolen by a previous owner etc. etc. Either way here was my quick fix to get the cables re routed neatly.
This is a bit of a random bike fix but I have found myself in this situation a couple of times throughout my bike mechanic times so thought I would share this simple cable clamp & cable routing repair. Here we have a bike that had absolutely no gear or brake cable guides left in the frame, nor did I have any to replace them with… Perhaps they wobbled loose or were stolen by a previous owner etc. etc. Either way here was my quick fix to get the cables re routed neatly.
While what I have used here isn’t the most aesthetically pleasing fix it gives you the general idea and hopefully some inspiration to create your own cable guide clamps for your bike.
You will need for your cable clamps
Large penny washer or similar
Bolts to fit your frame recesses (m4-m5 usually)
Plastic cable tidys
Hammer
Hacksaw
File
General workshop tools will be helpful no doubt
Vice
Making Your Cable Clamps:
Start by cutting off the edges of your penny washer so it is more of a rectangular shape. Then tidy up the cut edges with a file, removing any burs.
Now pinch one rounded side of the washer in a vice and hammer until the edges are kinked. Rotate the washer and do the same to the other side. Again tidy up any sharp edges with a file to avoid any damage to your gear/ brake cables and bike frame.
Now moment of truth! Once you are happy with the shape of your cable guide, get your bolt and carefully thread it into the recessed hole in your bike frame. Align each of the cables appropriately underneath your new cable guide and tighten. Make sure you only pinch the bolt tight and do not crush your brake or gear cables.
Finally you may find it useful to clip on some cable tidys to keep the cables running where you want them. Finally once you are happy take it for a test spin to see if everything stays in place.
As I said earlier this instance was only a very quick fix so isn’t the best looking. With some thought you could use coloured washers of even spray paint to match your bike!
How To Bleed a Shimano Hydraulic Disc Brake
Shimano have made it fairly straight forward and simple when it comes to maintenance and bleeding of their disc brakes. Detailed here are the steps required to fully bleed a Shimano brake, which will be required after a hose replacement for example which we have also previously covered in this blog.
Shimano have made it fairly straight forward and simple when it comes to maintenance and bleeding of their disc brakes. Detailed here are the steps required to fully bleed a Shimano brake, which will be required after a hose replacement for example which we have also previously covered in this blog.
You will need for a Shimano brake bleed:
Shimano Bleed Kit (supplied with syringe and reservoir pot)
7mm Spanner
Allen Keys
Brake Cleaner
Bleed blocks (or something similar to keep the pistons back)
Tissue
Bleeding Your Brake:
Firstly adjust your brake lever to so that it is horizontal and the bleed port bolt is upright. Also remove the pads incase of any spillage and replace with bleed blocks.
Remove the bleed port bolt on the lever with an allen key, be careful not to loose the rubber o ring off it. Then carefully thread in the Shimano Bleed Reservoir, the threads are plastic so can be easily damaged just be patient and tighten until it bites. Then fill the pot with a small amount of Shimano mineral oil and remove the bung (long stalk in the center). Now fill your syringe with mineral oil and push on your syringe hose to the bleed nipple of the calliper. It’s a good idea to stuff some tissue in around the bleed ports to catch any excess oil.
Once you are happy everything is set up, loosen the bleed nipple of the calliper with your spanner by a few turns. Carefully apply pressure to the syringe and observe oil filling the Shimano pot on the lever. The oil will bubble and may be discoloured, if this is the case keep repeating the process until the oil runs clear into the pot. If you need to refill the syringe, make sure you nip up the bleed nipple before removing.
Once your oil is running clear into the pot, tighten the bleed nipple, remove the syringe and clean up any excess oil at the calliper with brake cleaner and a rag. With the calliper end all secured, cycle the brake lever several times until there are no more air bubbles being produced in the pot. Once you are happy replace the bung and remove the pot again making sure you retain the o ring on the thread. Be fairly swift in replacing the lever bleed port bolt to ensure you don’t leak any oil.
Finally before you put any tools away, its a good idea to replace your pads and rear wheel and cycle the lever are few more times and check the brake is biting where you want it too and that its not spongey. If so then there is still air in the system.
If this is the case fit the pot onto the lever with some oil and again cycle the brake until more air bubbles come out. This should then solve it.
How To Fit A New Shimano Zee Hydraulic Disc Hose | With Kit Provided
With modern bikes often using internal cable routes, changing a brake, especially a rear brake, can be a bit of a task. Luckily Shimano have made things very easy by supplying dedicated replacement part packages which include every thing you will need and in my opinion are the best option when it comes to maintenance. Here we show you how to change a Shimano Zee disc brake hose. The rear brake was being fitted to a longer frame so a longer hose was needed. to reach the lever.
Anything involving hydraulic brakes can be a bit of a daunting task! You get used to the ‘perfect’ bite point and just change the pads once in a while, for many modern hydraulic brakes are a bit of a fit and forget affair. With modern bikes often using internal cable routes, changing a brake, especially a rear brake, can be a bit of a task. Luckily Shimano have made things very easy by supplying dedicated replacement part packages which include every thing you will need and in my opinion are the best option when it comes to maintenance.
Here we show you how to change a Shimano Zee disc brake hose. The rear brake was being fitted to a longer frame so a longer hose was needed. to reach the lever.
You Need for shimano zee hose replacement:
New Shimano Disc Brake Hose (rear) includes olive, barb, seals and hose grips
Allen Keys
8mm spaner
Descent Pliers
Cable Cutter (ideally disc hose specific but any cable cutters should work)
Shimano Bleed Kit and Mineral Oil
Replacing your hose
Firstly identify the hose to calliper connection bolt and ensure that your new hose matches the old one. Note it is good practise to remove your disc brake pads, I was going to replace the pads anyway so just left the old ones in for the most part.
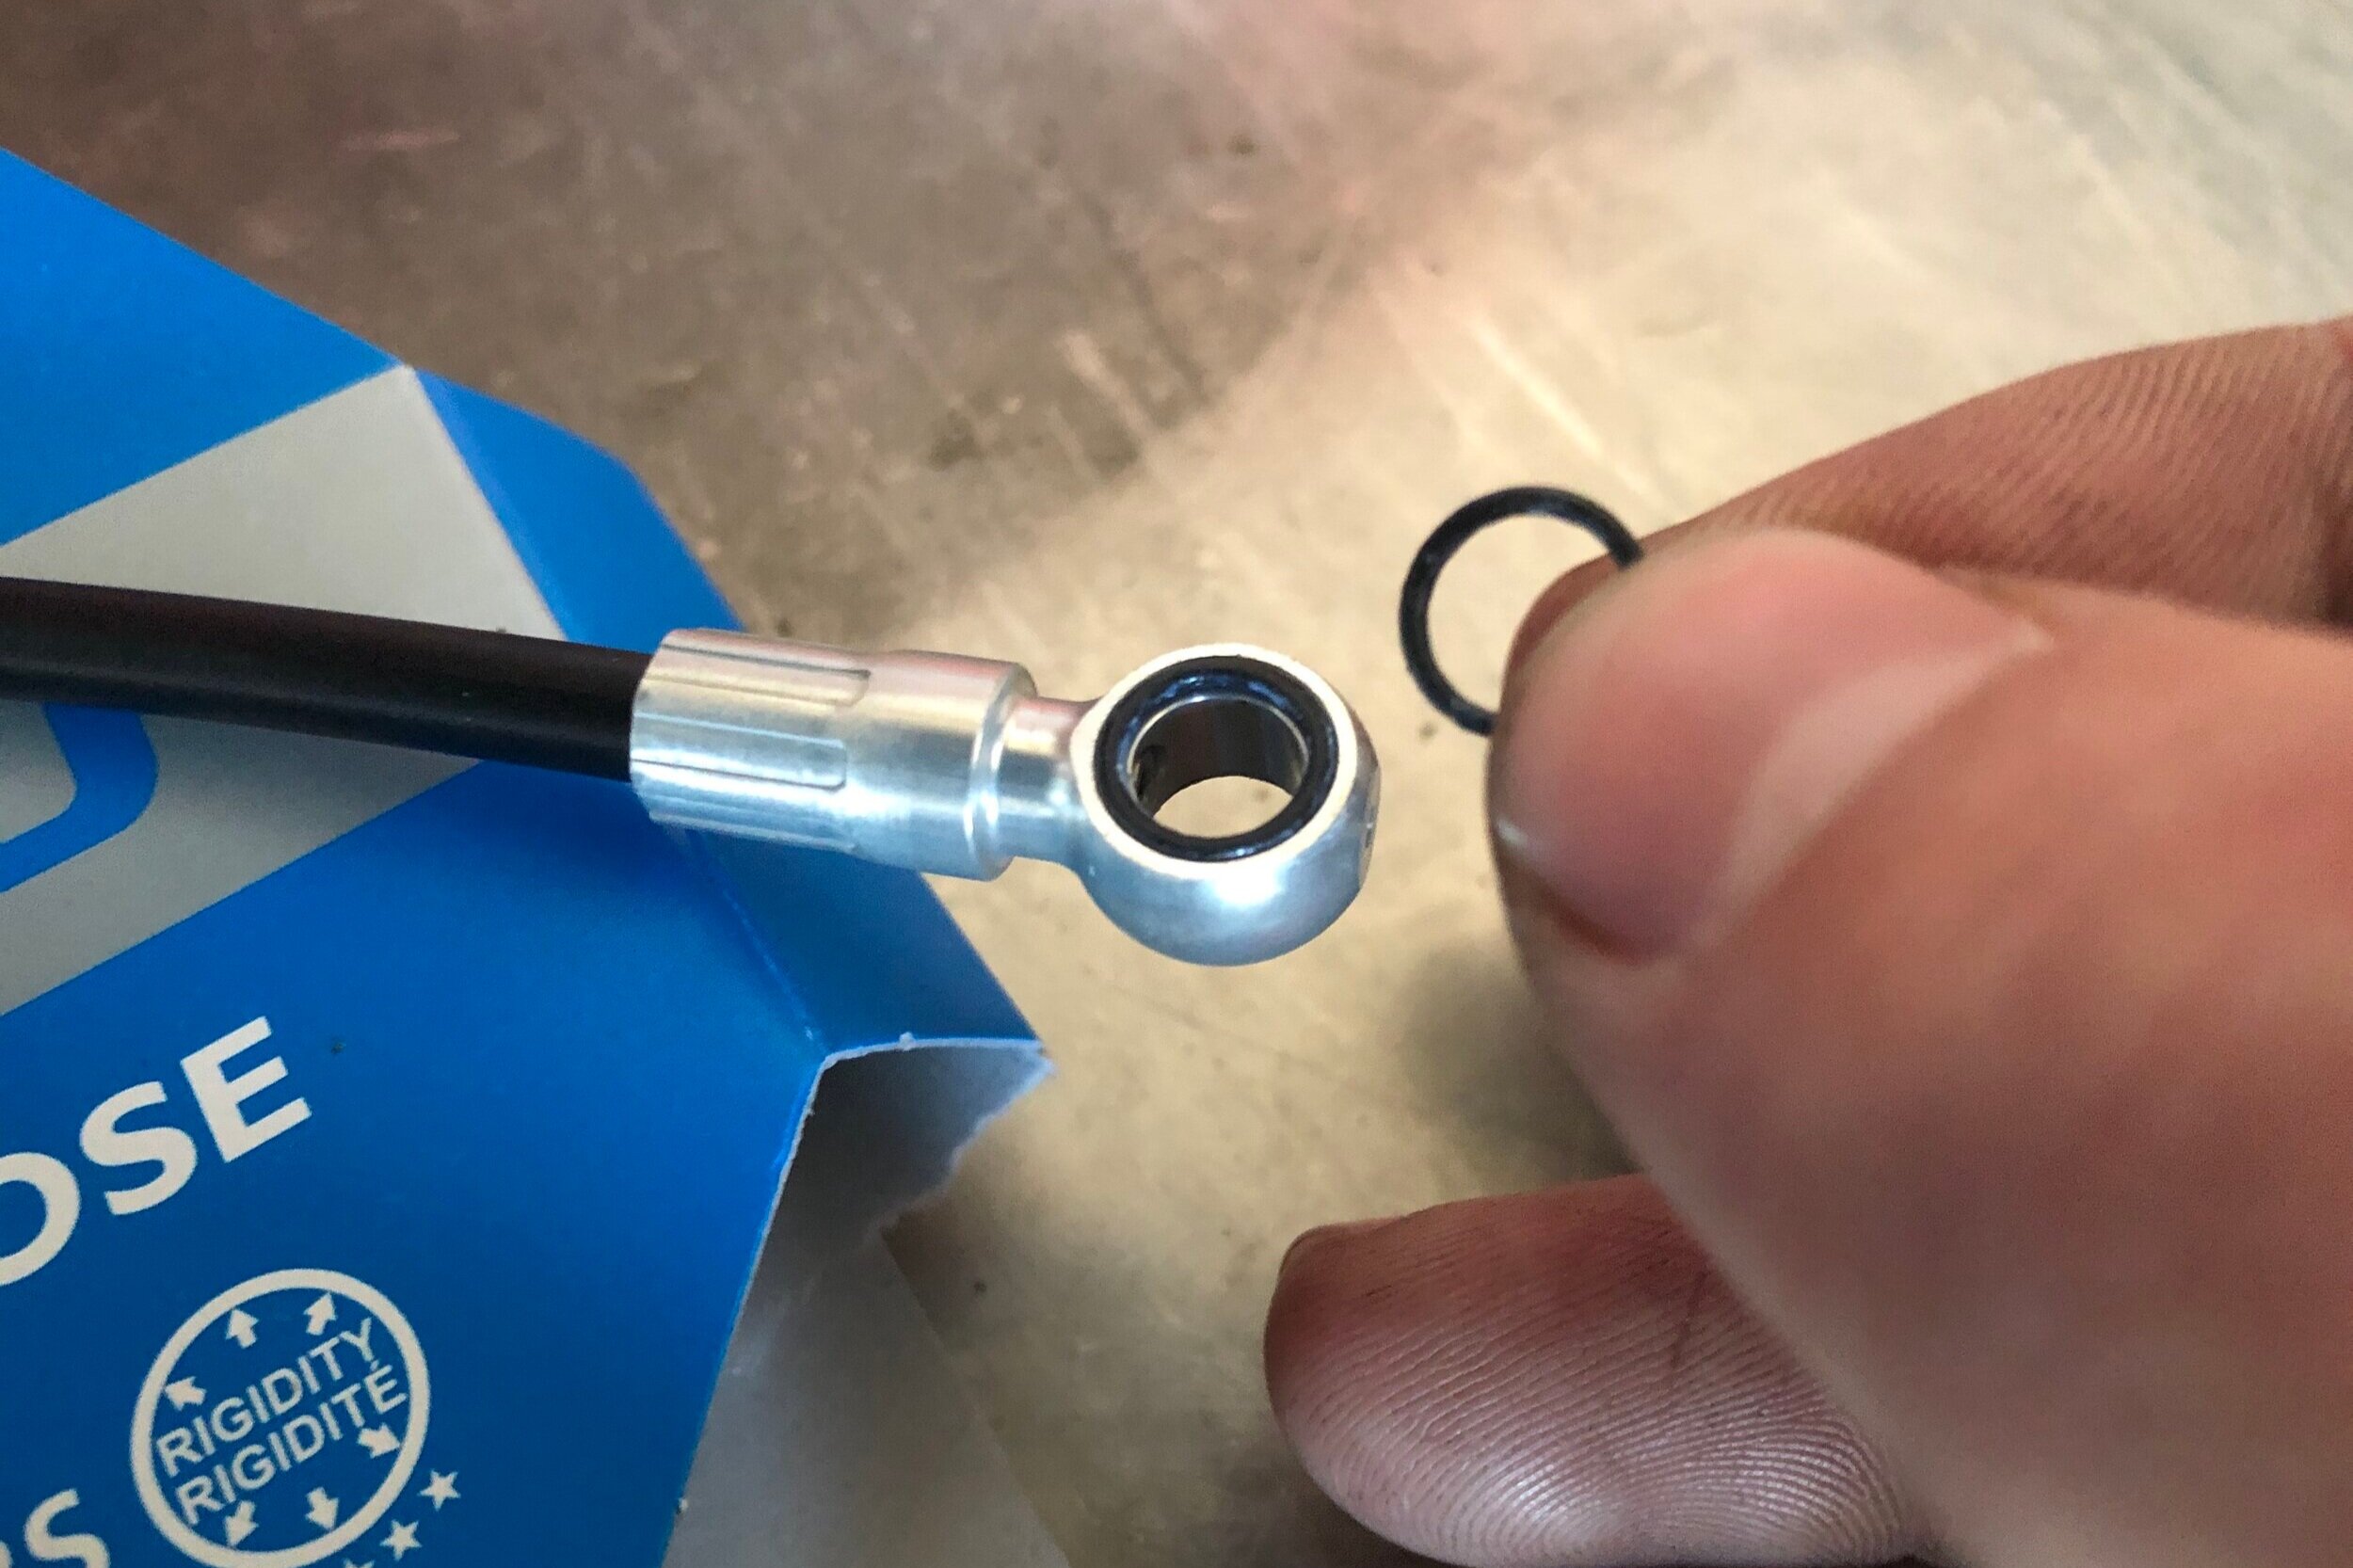
Next carefully place the provided o rings into the slots on the Shimano brake hose connector, there should be 1 either side (you can use the old hose for reference if you need) . Now using your allen key unbolt the old hose and set aside.
Now bolt on the new hose with the new bolt supplied being careful not to pinch the o rings when you tighten the bolt. It is a good idea to start routing the hose up the frame before fully tightening the hose to calliper connection to ensure the hose leaves the calliper at the right angle.
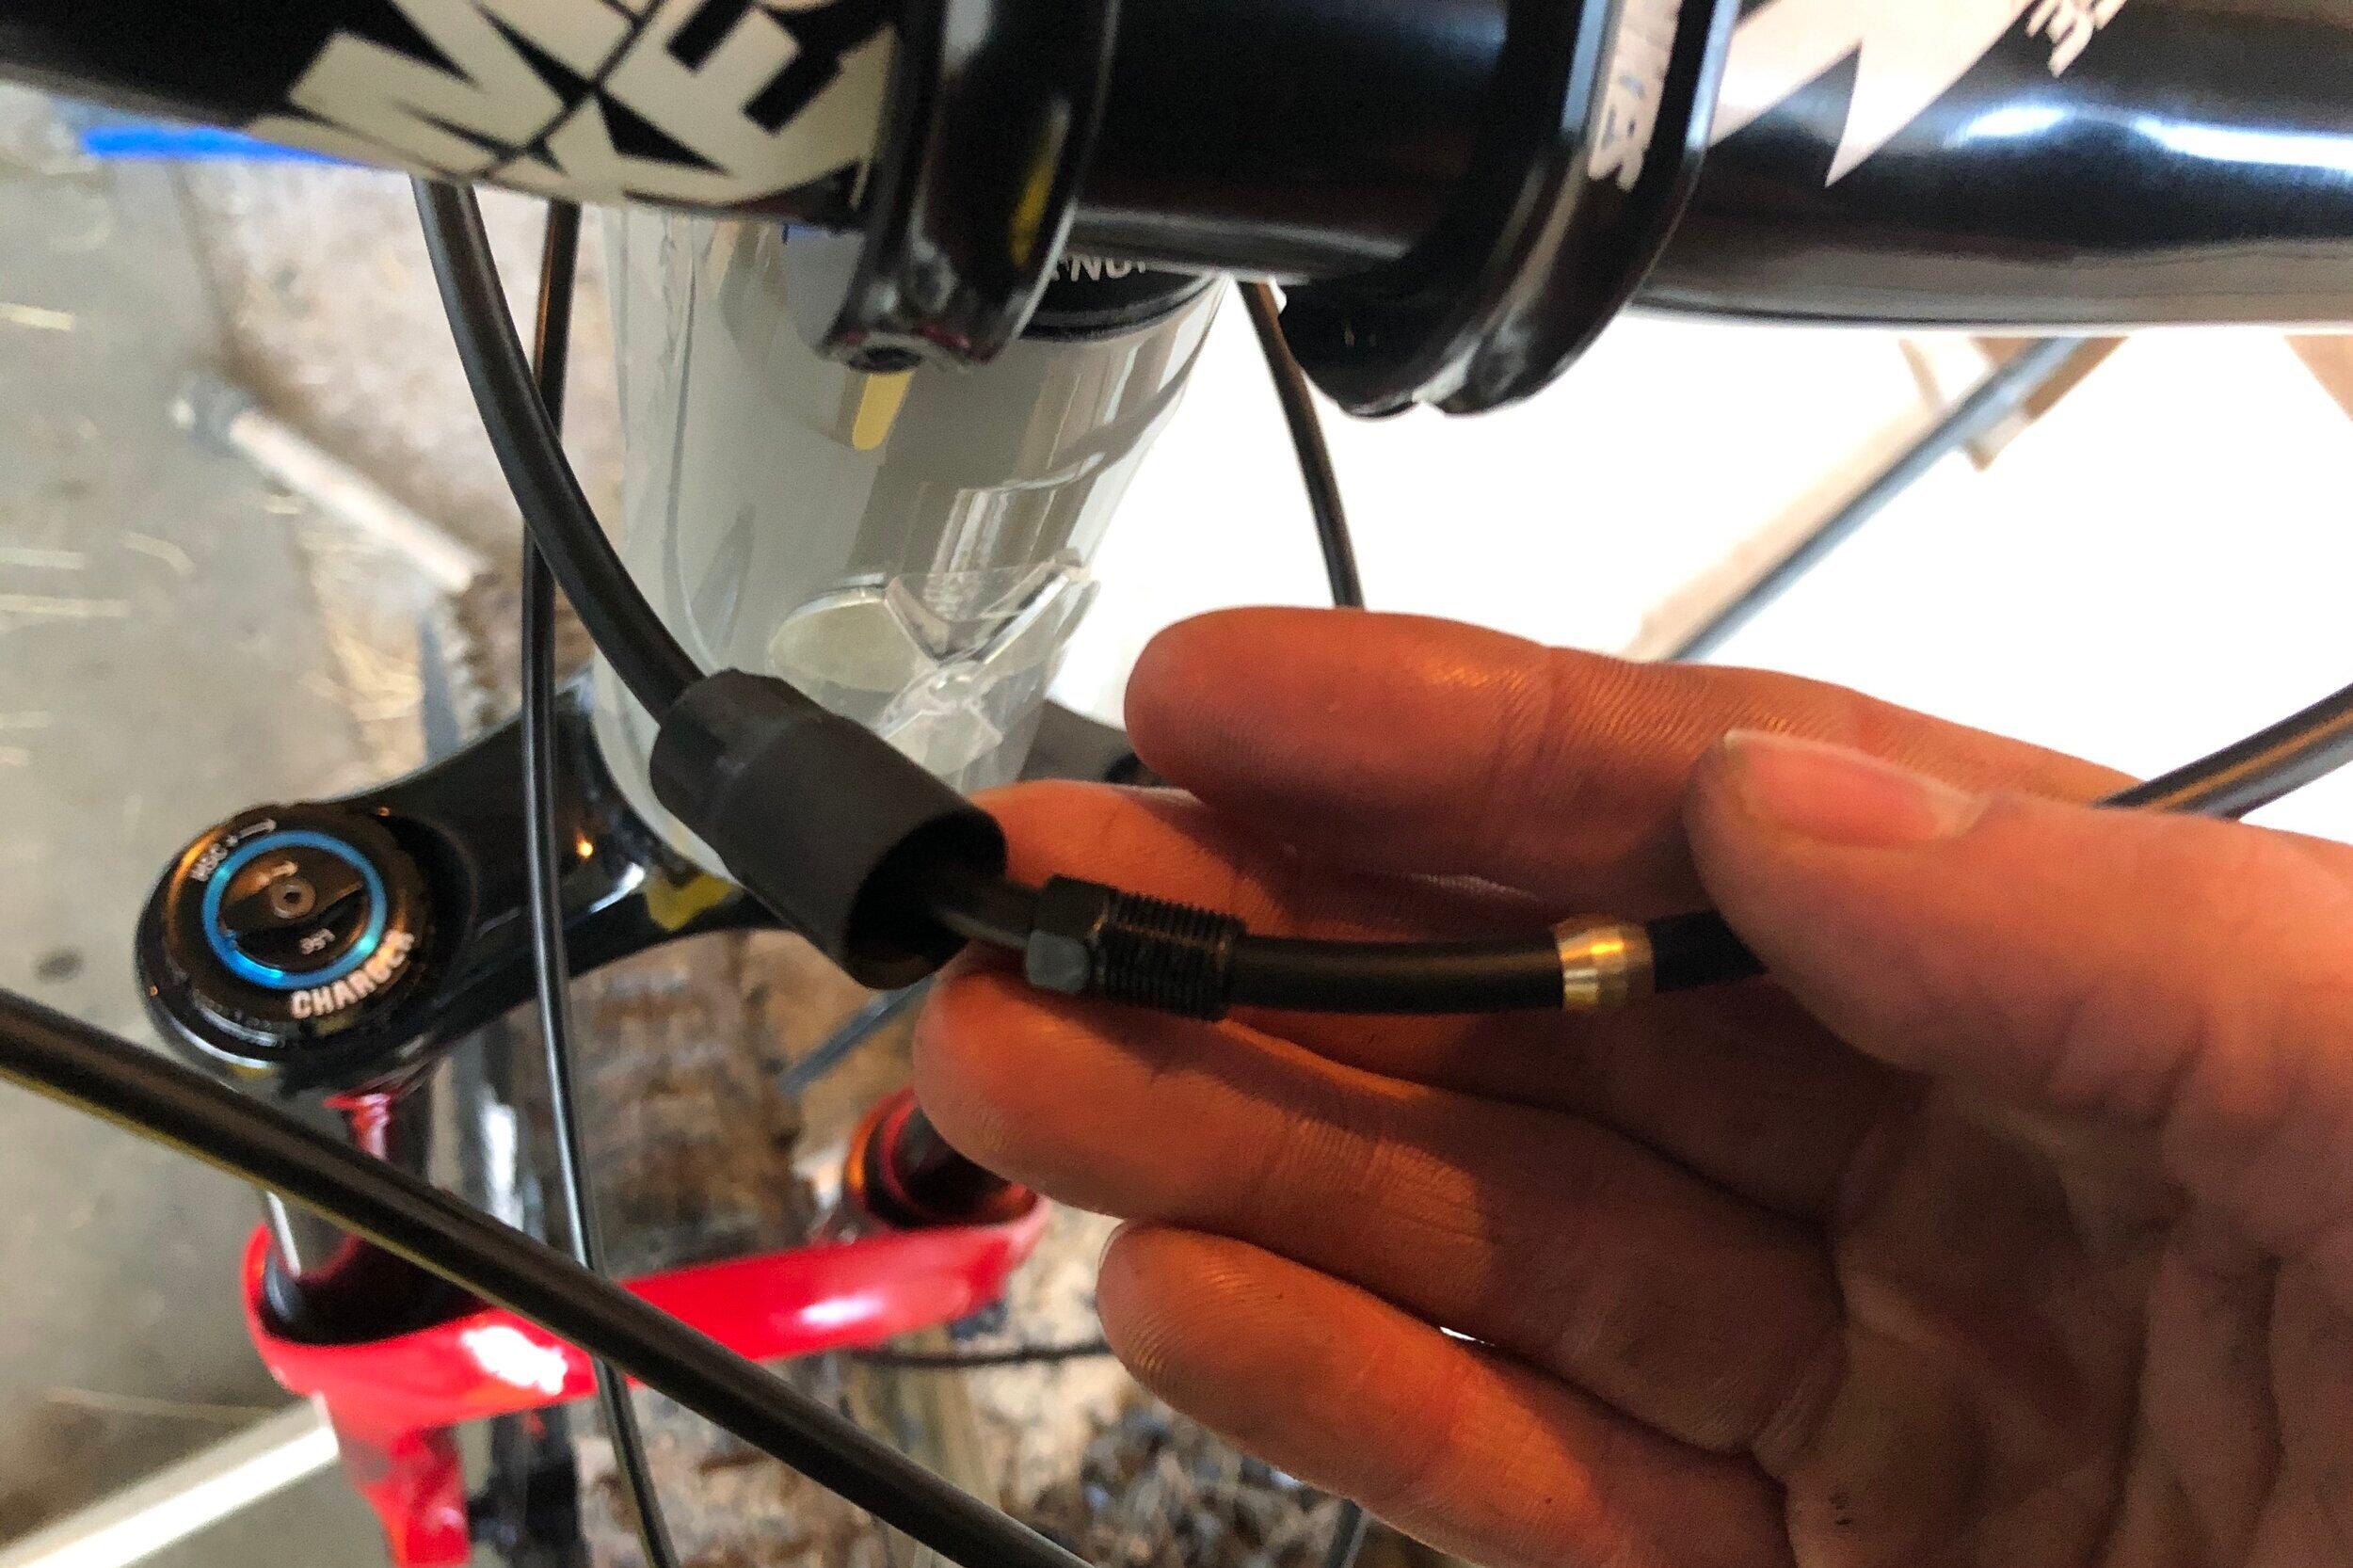
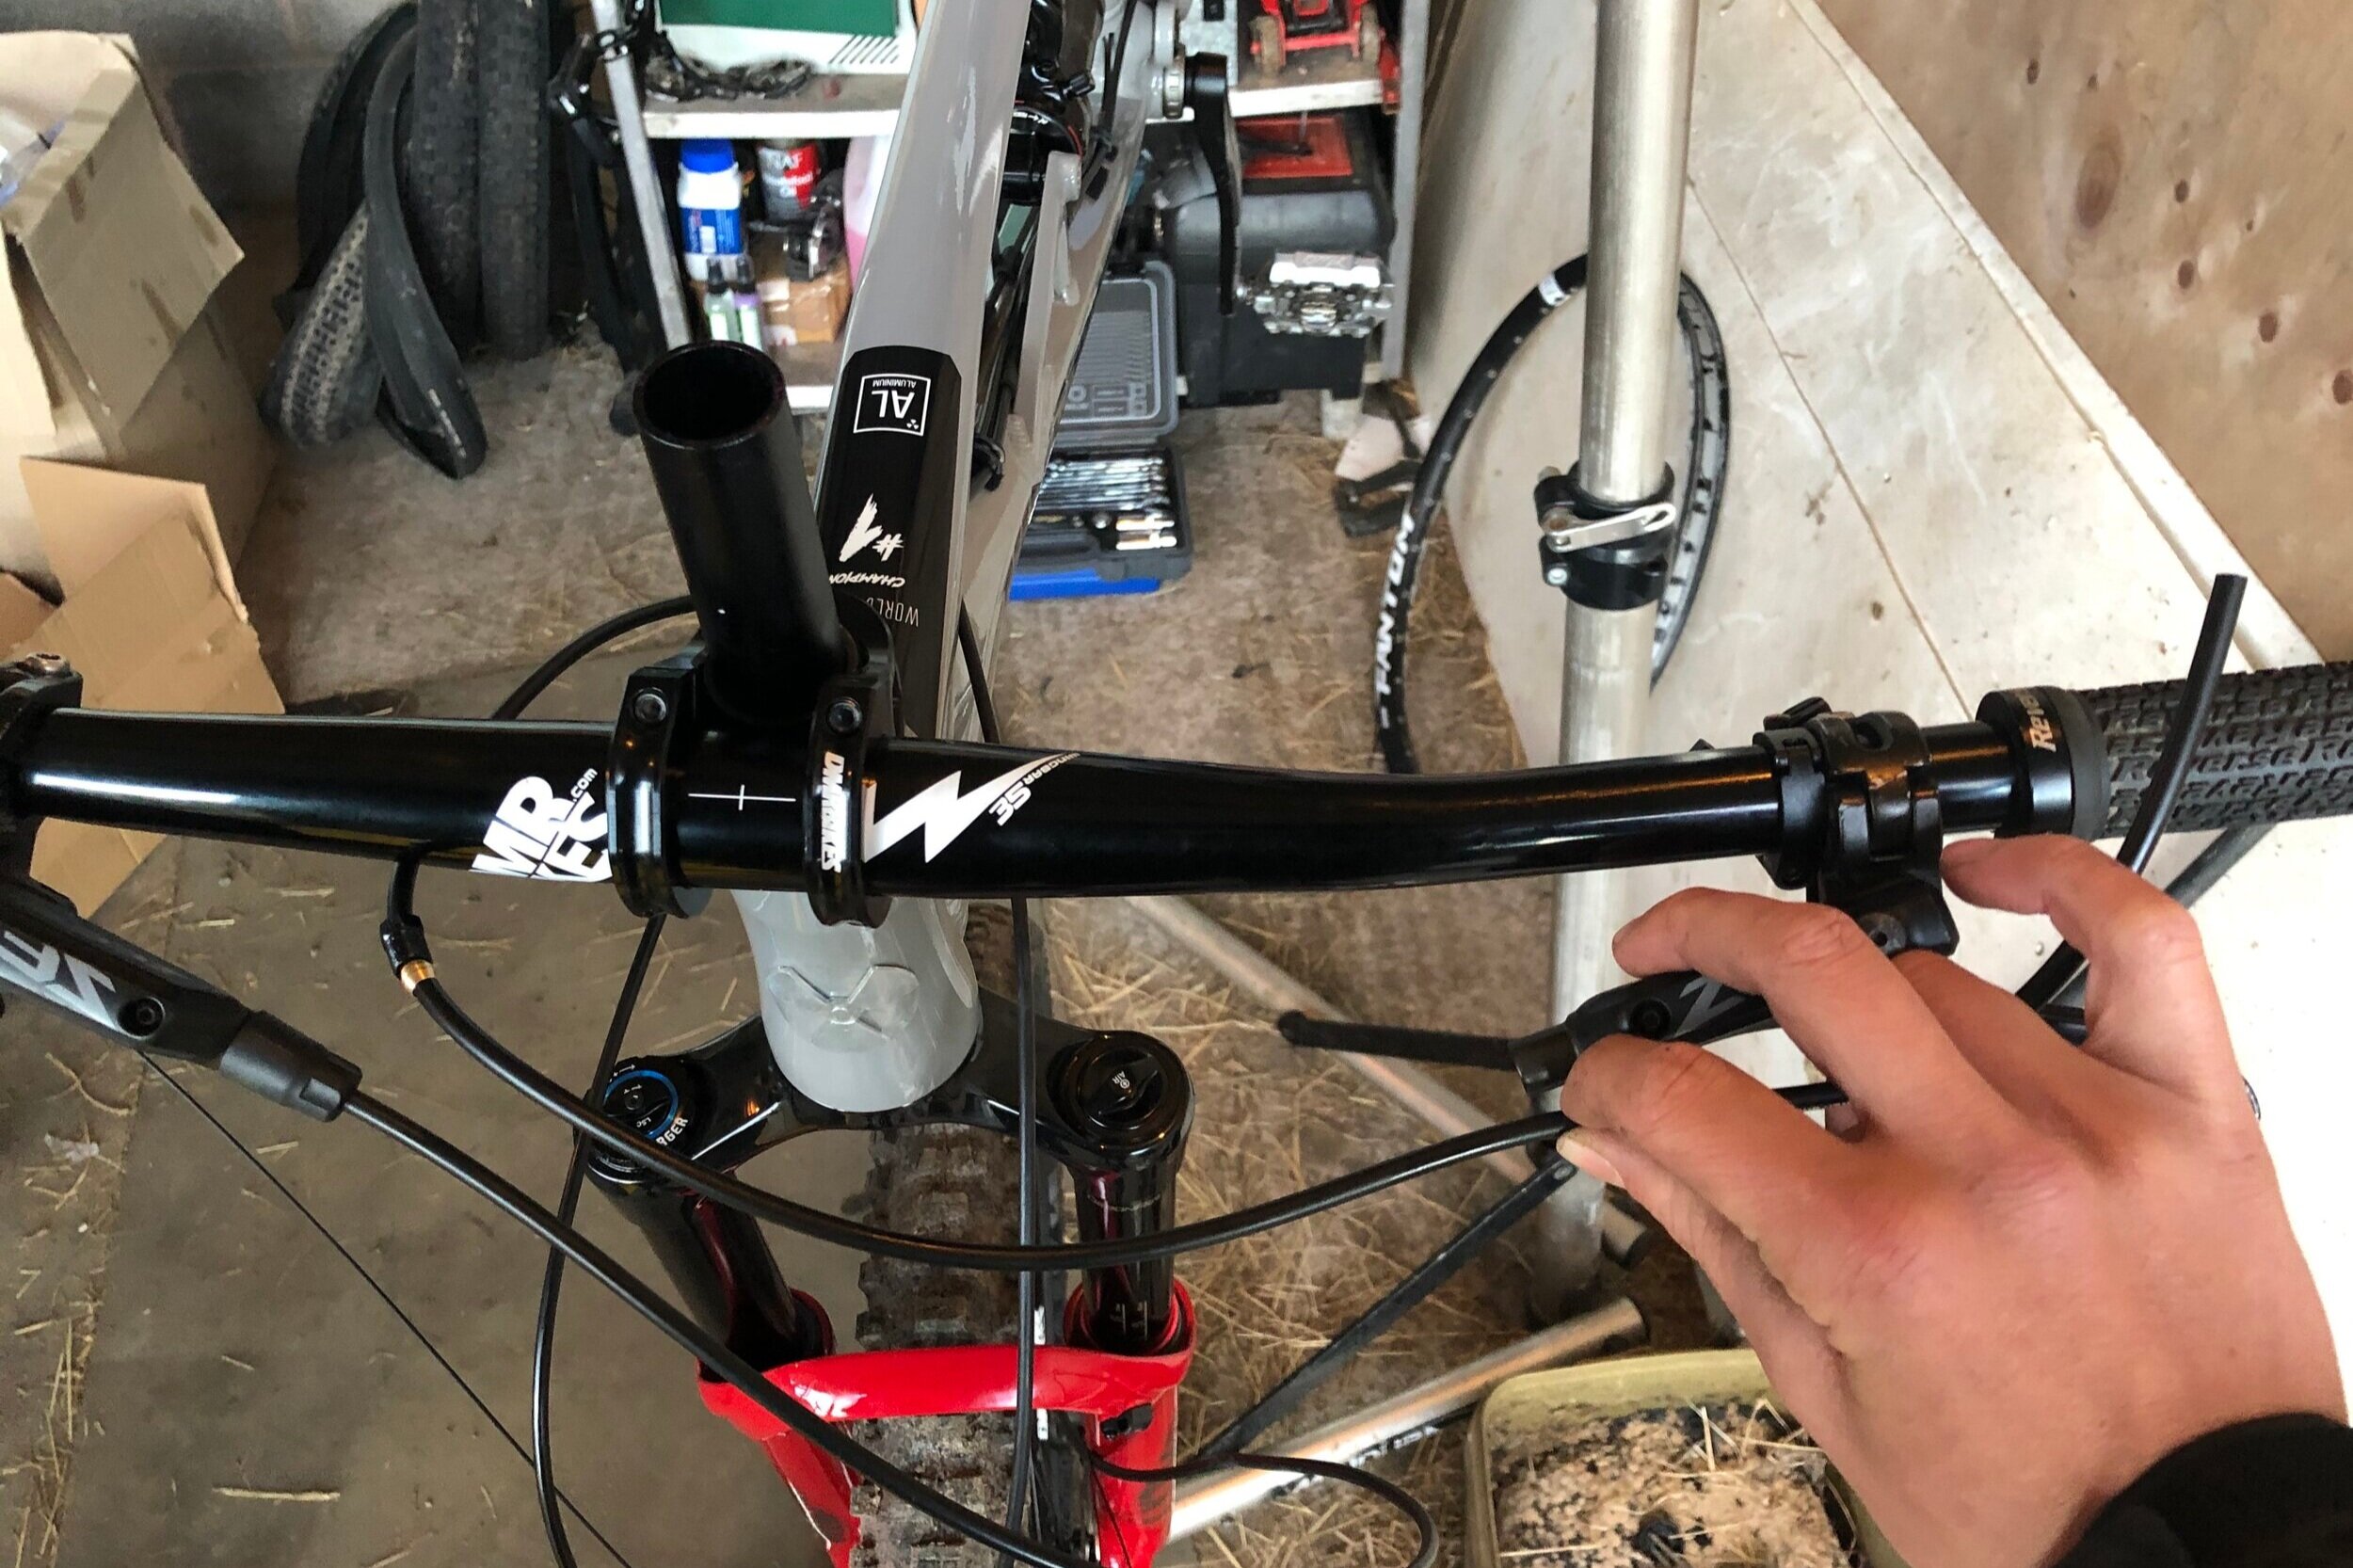
Next fully route the brake hose up to the handle bars and slide on the hose - lever connections in the order as pictured (rubber cover, bolt, olive). Note I have some foam sleeve to protect the frame from cable rub so if you have something similar it is a good idea to put it on now
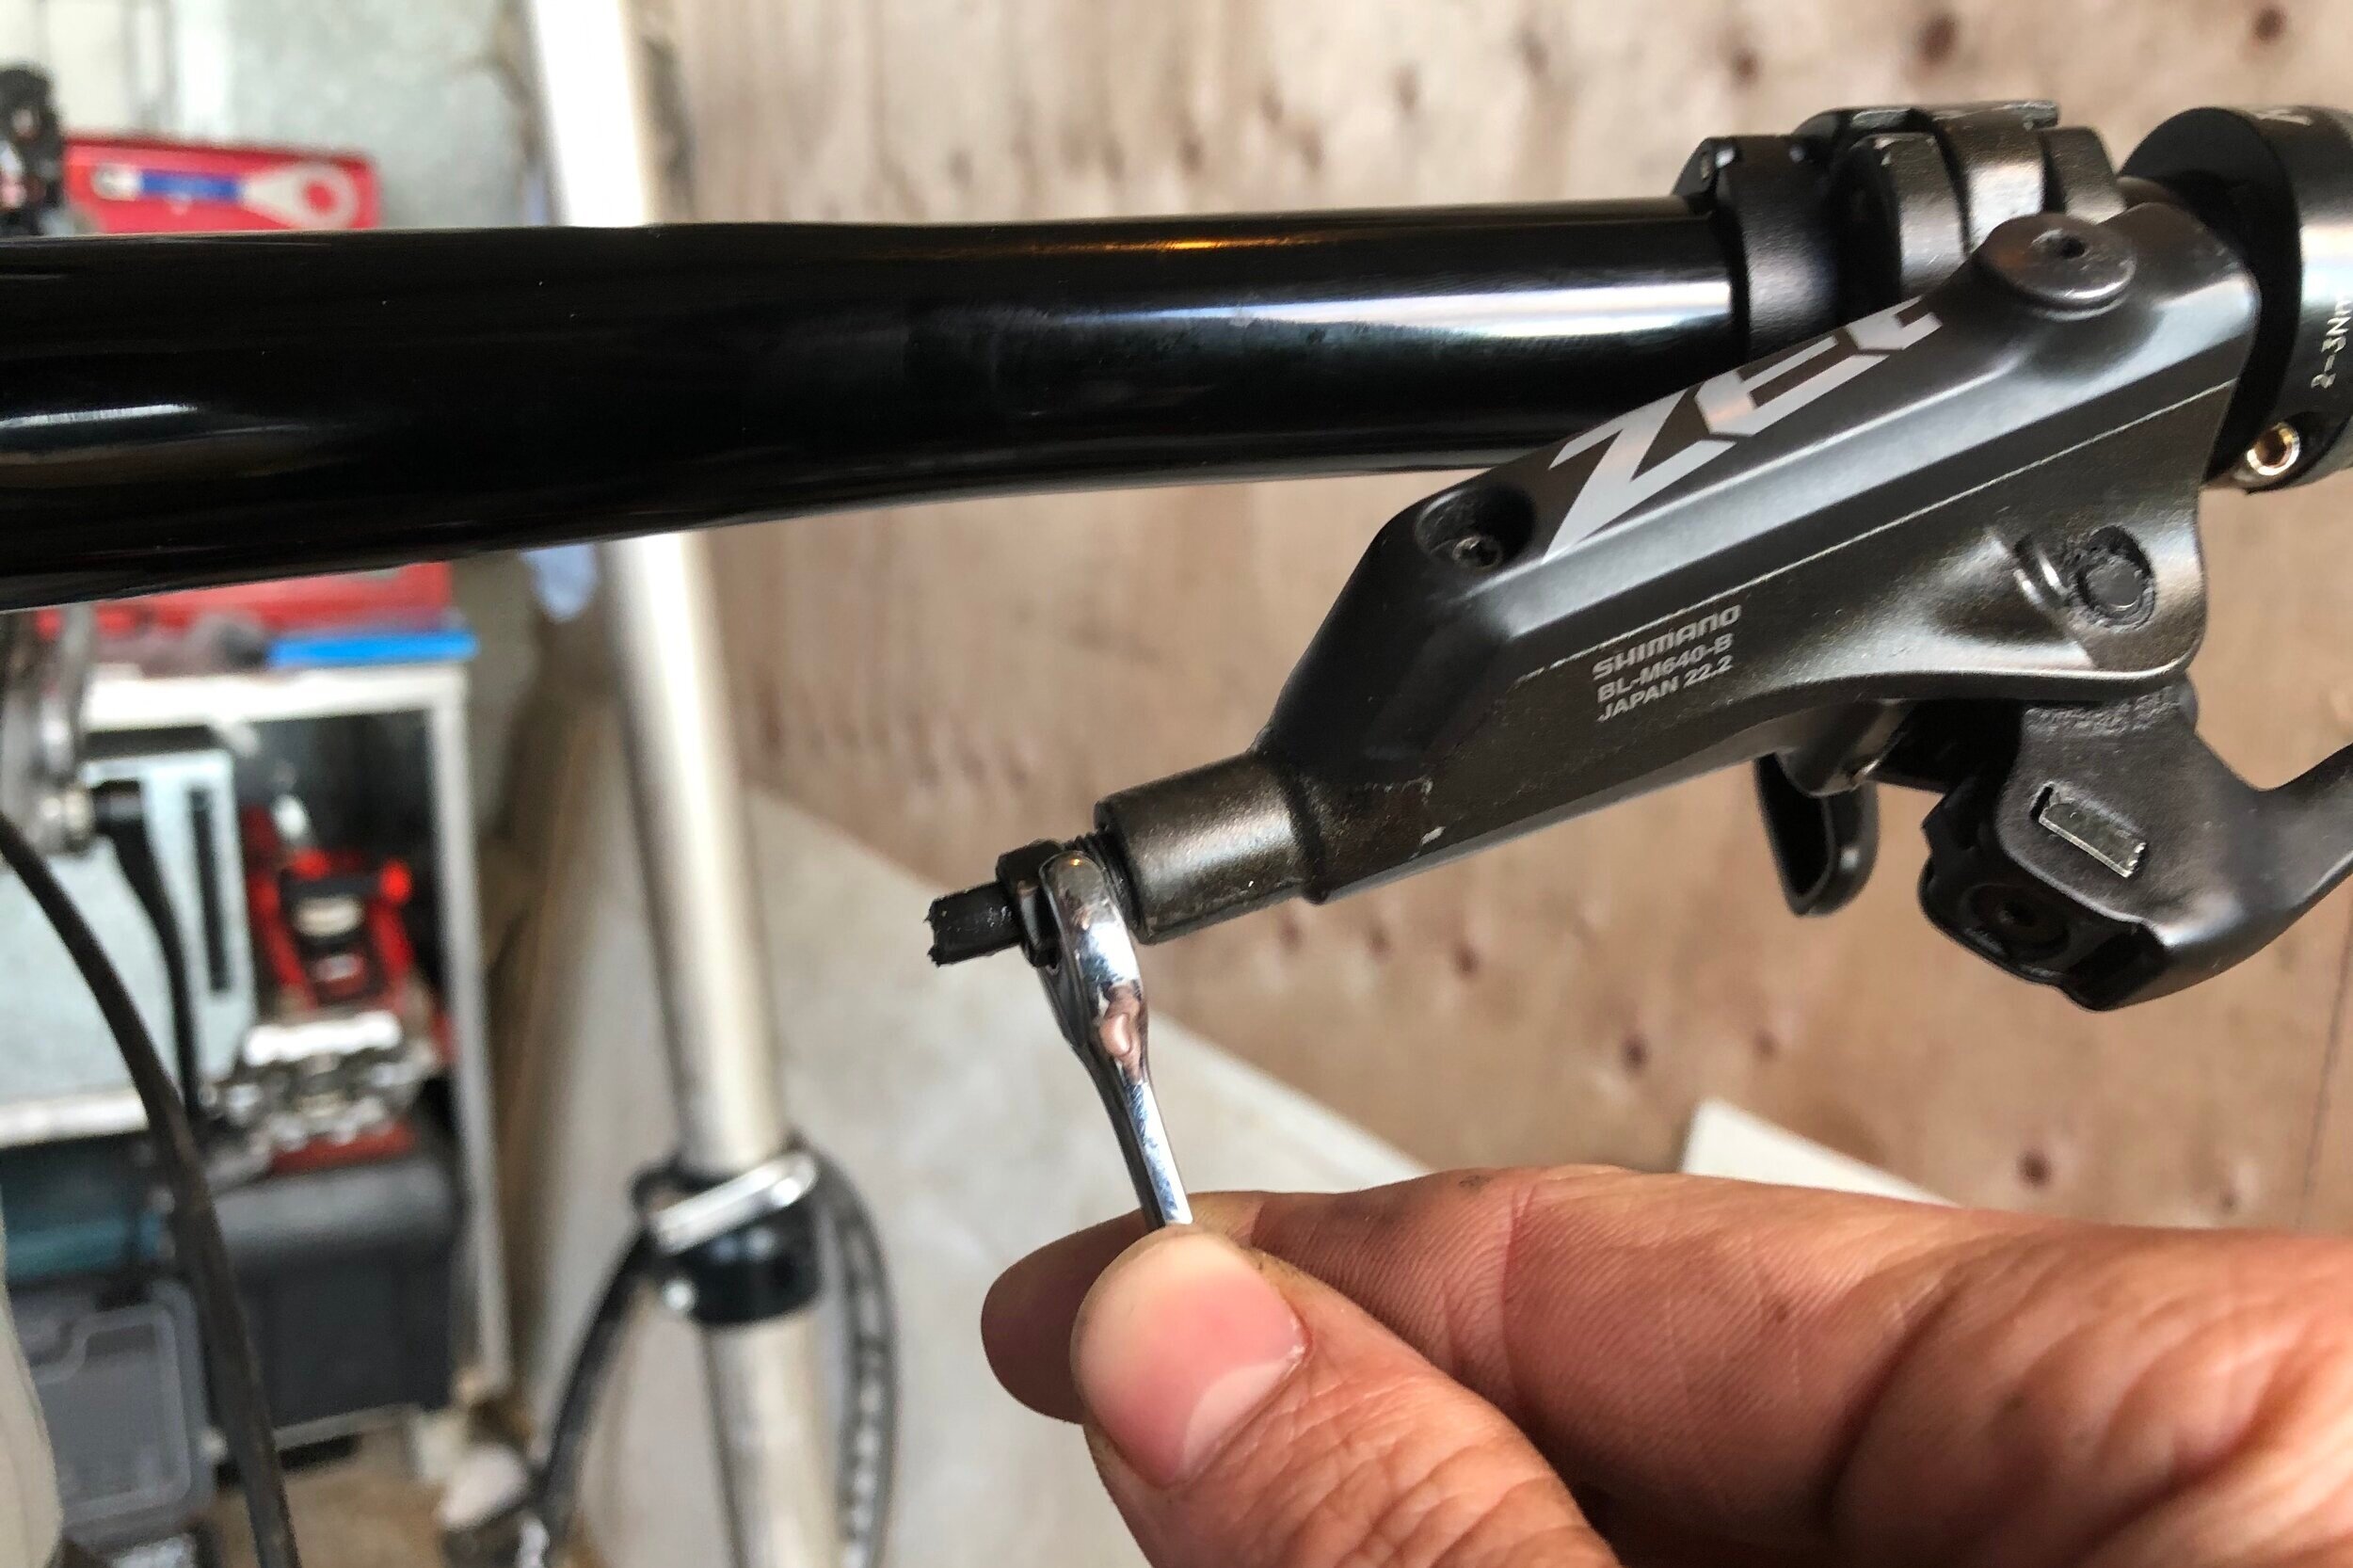
Next remove the old hose from the lever using the spanner, you may have to apply some pressure to the top of the lever so it doesn’t spin on the bars while you undo the bolt. With the old hose removed, offer up the new hose (again ensure you have fully routed it at this point) make sure there is enough slack to rotate the bars left and right without the disc brake hose being pulled too tightly.
Once you are happy cut the hose down. Inspect the cut end of the hose and if needs be, gently open it up slightly with a thin pick to accommodate the barb.
Insert the barb into the hose as far as possible by hand. Next grip the hose with the pliers and hose blocks, this can be a bit fiddly. Also ensure you don’t grip the hose too far up as it may restrict the barb from entering the hose. Then using a soft flat metal hammer or object similar press and tap the barb into the end of the hose fully.
Make sure the barb has been inserted fully before proceeding, the collar of the barb should be sitting flush with the hose.
While applying pressure on the hose towards the lever, carefully thread the bolt into the brake lever and tighten. It should feel a little stiff but keep tightening as it is the olive crushing to seal the hose into the lever. You will feel the olive crush and the bolt get tight into the lever, bite it up but be careful not to over tighten… don’t go too mad!
Finally slide the cover over the hose. You will now need to perform a full bleed of the brake which we have covered here if you need some help. Good luck with the fresh brakes!!
Lostyak GoPro Run | New Antur Stiniog Red Run
First ride of the brand new Antur Stiniog MTB red run!
First ride of the brand new Antur Stiniog MTB red run!
This trail has an alpine feel to it with some high speed straights into some big but tight berms leading to a super flowy bottom section full of step downs, hips and table tops. The track then joins onto the last few turns of the Double Black run.
As the track was brand new the trail was a bit soggy in places and some of the berms were a little bit slick but overall a great addition to the bike park in our opinion... Check out our run with the addition of a windy rock drop at the end!
Lostyak GoPro Run | La Tabogane Morgins
Morgins is a quiet corner of the mountain resort as access from the more popular Morzine and Les Gets towns can be tricky! But less traffic makes for smoother trails and the Morgins trail crew do an amazing job of keeping the trails up to scratch.
We take you on a run of possibly THE most flowy bike park trail in the whole of the Portes Du Soleil.
Morgins is a quiet corner of the mountain resort as access from the more popular Morzine and Les Gets towns can be tricky! But less traffic makes for smoother trails and the Morgins trail crew do an amazing job of keeping the trails up to scratch.
Come with us as Lost Yak takes you on a run of the amazing La Tabogane red run, a track which is also used in Swiss IXS Cup races.
How To Wire In a Front Bottle Dynamo Light
We’ve had a recent refurbishment project of an old Pashley bike that had been left in the rain and the dynamo light, a real classic, was totally perished and corroded. So here’s a very simple guide as to how to fit and wire a new bottle dynamo front road bike light.
I’ll start by saying I am no electrician! To be honest I often find the whole electronics thing a little bit daunting. But as a bike mechanic it is something Ive had to embrace over the years, what with the progression of electronic shifting etc.
We’ve had a recent refurbishment project of an old Pashley bike that had been left in the rain and the dynamo light, a real classic, was totally perished and corroded. So here’s a very simple guide as to how to fit and wire a new bottle dynamo front road bike light.
You Need For Your Dynamo Fitting:
Bottle dynamo and compatible light (I bought it as a kit here’s what was included pictured above)
Wire cutters
Stanley Knife
Allen keys or spanners for attachment
Installing your bottle dynamo and light
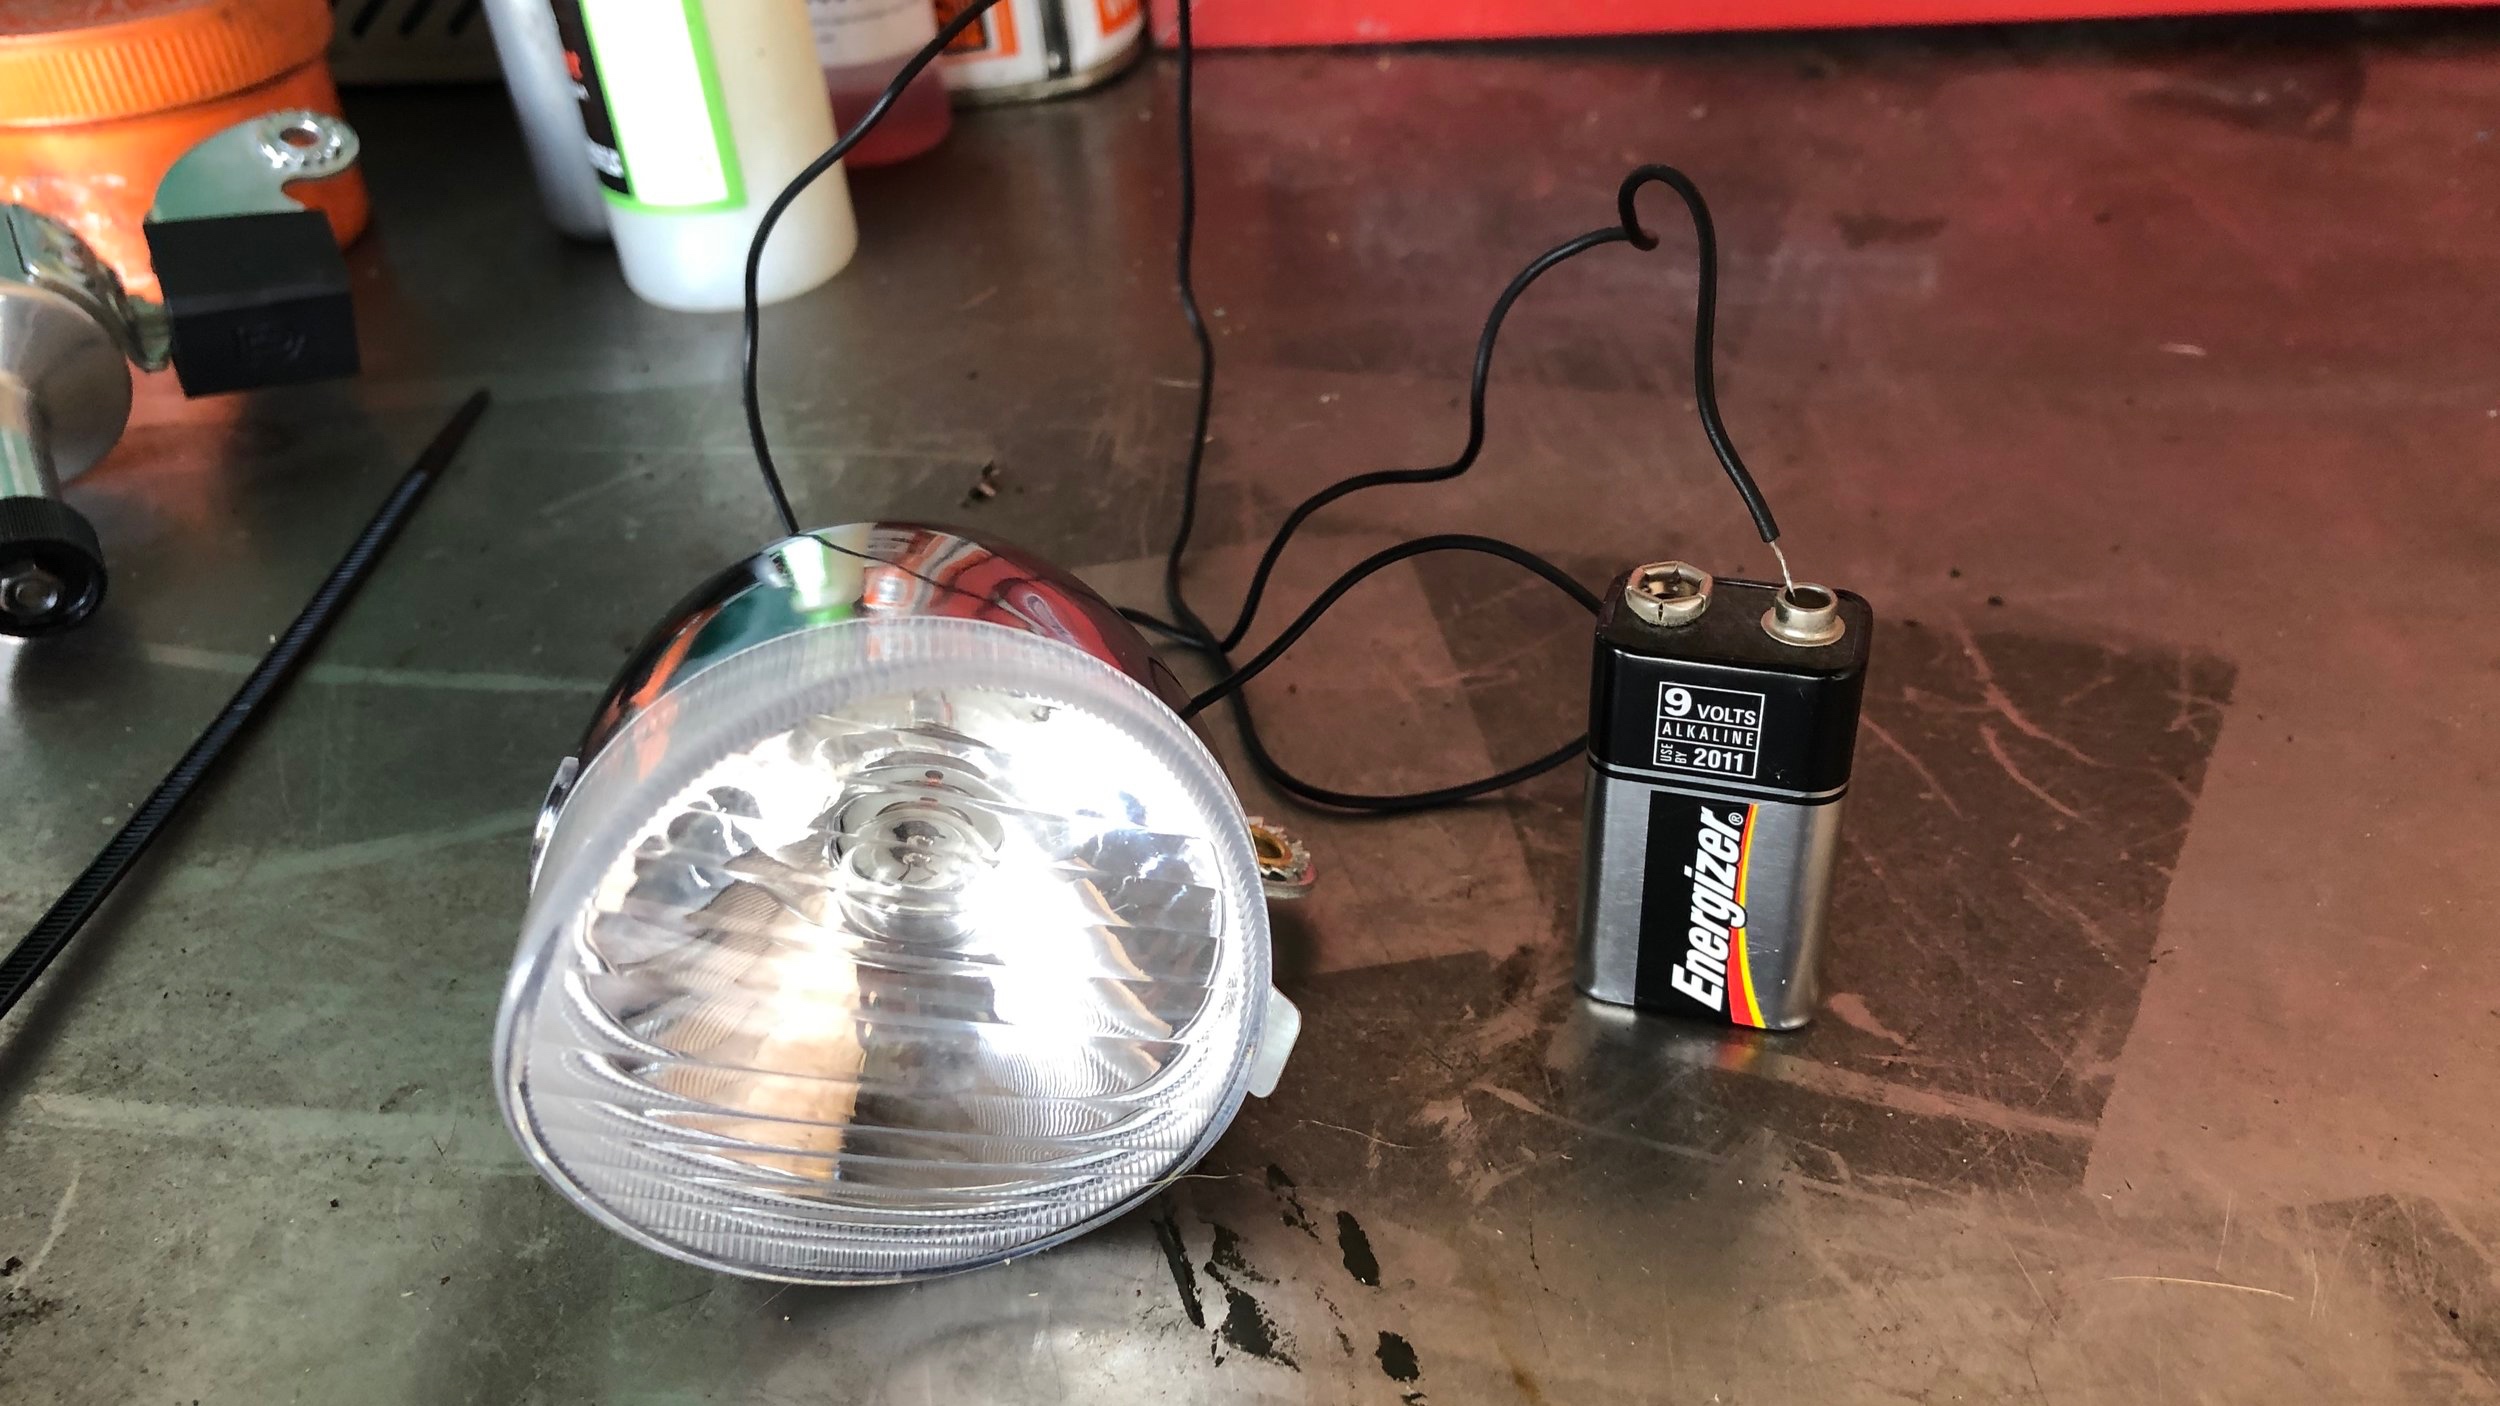
Firstly its a good idea to test the light works, in this case I bought it new so assumed it would but there’s no harm in testing!
Attach the positive wire from the light to the positive of the battery, in my case there is only one wire already wired to the lamp this is the positive.
Then touch the lamp to the negative terminal of the battery to complete the circuit and hope the bulb lights up! If there is a negative terminal or wire on the light, it’s the same process just using the wire.
Next it is time to fit the light, there is usually some sort of adaptor included with the light that you can get to fit with a few spacers and bolts. Bottle dynamos are designed to run on the tire or rim so will mount to the fork leg, The bike here has mounts dedicated to the dynamo however you can buy mounts that clamp to the fork, It is worth checking your bike before ordering the kit so you know what you’ll need.
Also note the bottle dynamo should be mounted as ‘straight’ as possible to the centre of the hub, this ensures the dynamo is working as efficiently as possible with minimal drag.
Now we have to attach wires! Heres a picture of the dynamo as you can see there is a clear positive terminal, this needs to attach to the positive from the light or the wire already wired into the lamp in my case.
Carefully route the cable down to the dynamo ensuring it is out of harms way and not obstructing any other components.
Now moment of truth… Provided you haven’t used any rubber spacers in the installation process, the circuit will be complete via the metal frame of the bike. Note the additional terminal on my dynamo is for a rear light.
If you have a negative terminal on your front light and dynamo then you will have to connect these up in a similar fashion as the positives in order to get a complete circuit.
While this is a very basic example we hope it inspires and at least gives you the confidence to give the dynamo light a go, it’s a great addition to any bike especially suiting vintage steel frames.
How To VW Caddy Van Rear Wiper Delete | Using Old Bike Parts
So having searched for hours trying to find the best Caddy rear wiper blank after deciding to remove mine, I only seemed to find random ebay results for wiper deletes for Japanese cars. I decided to consult the tool box one last time before spending pointless money in the DIY shop incase I had something that would do the job. Luckily I did and I think most fairly keen cyclists would probably have, if not could easily acquire all the parts to make a similar invention on their car or van.
So having searched for hours trying to find the best Caddy rear wiper blank after deciding to remove mine, I only seemed to find random ebay results for wiper deletes for Japanese cars. While there were some nice looking threaded rear window deletes that claimed to seal 24mm holes… The hole in the door after removing the rear window wiper on a VW Caddy is 27mm! I decided to consult the tool box one last time before spending pointless money in the DIY shop incase I had something that would do the job.
Luckily I did and I think most fairly keen cyclists would probably have, if not could easily acquire all the parts to make a similar invention on their car or van that not only looks smart, but also seals the old rear wiper hole a lot more securely than an over priced plastic wiper delete from ebay. We are basically plugging the hole in the van with the same tools used to hold a bike stem to the forks on most modern mountain bikes.
You Need For Your Rear Wiper Delete:
Bicycle head set top cap
Star nut (any nut will do just these are self gripping)
Headset Spacer
Assorted O ring seals
Long bolt
Random spacers would help
Sealant
Brake cleaner
Rag or towel
Gloves
Deleting Your Rear Wiper:
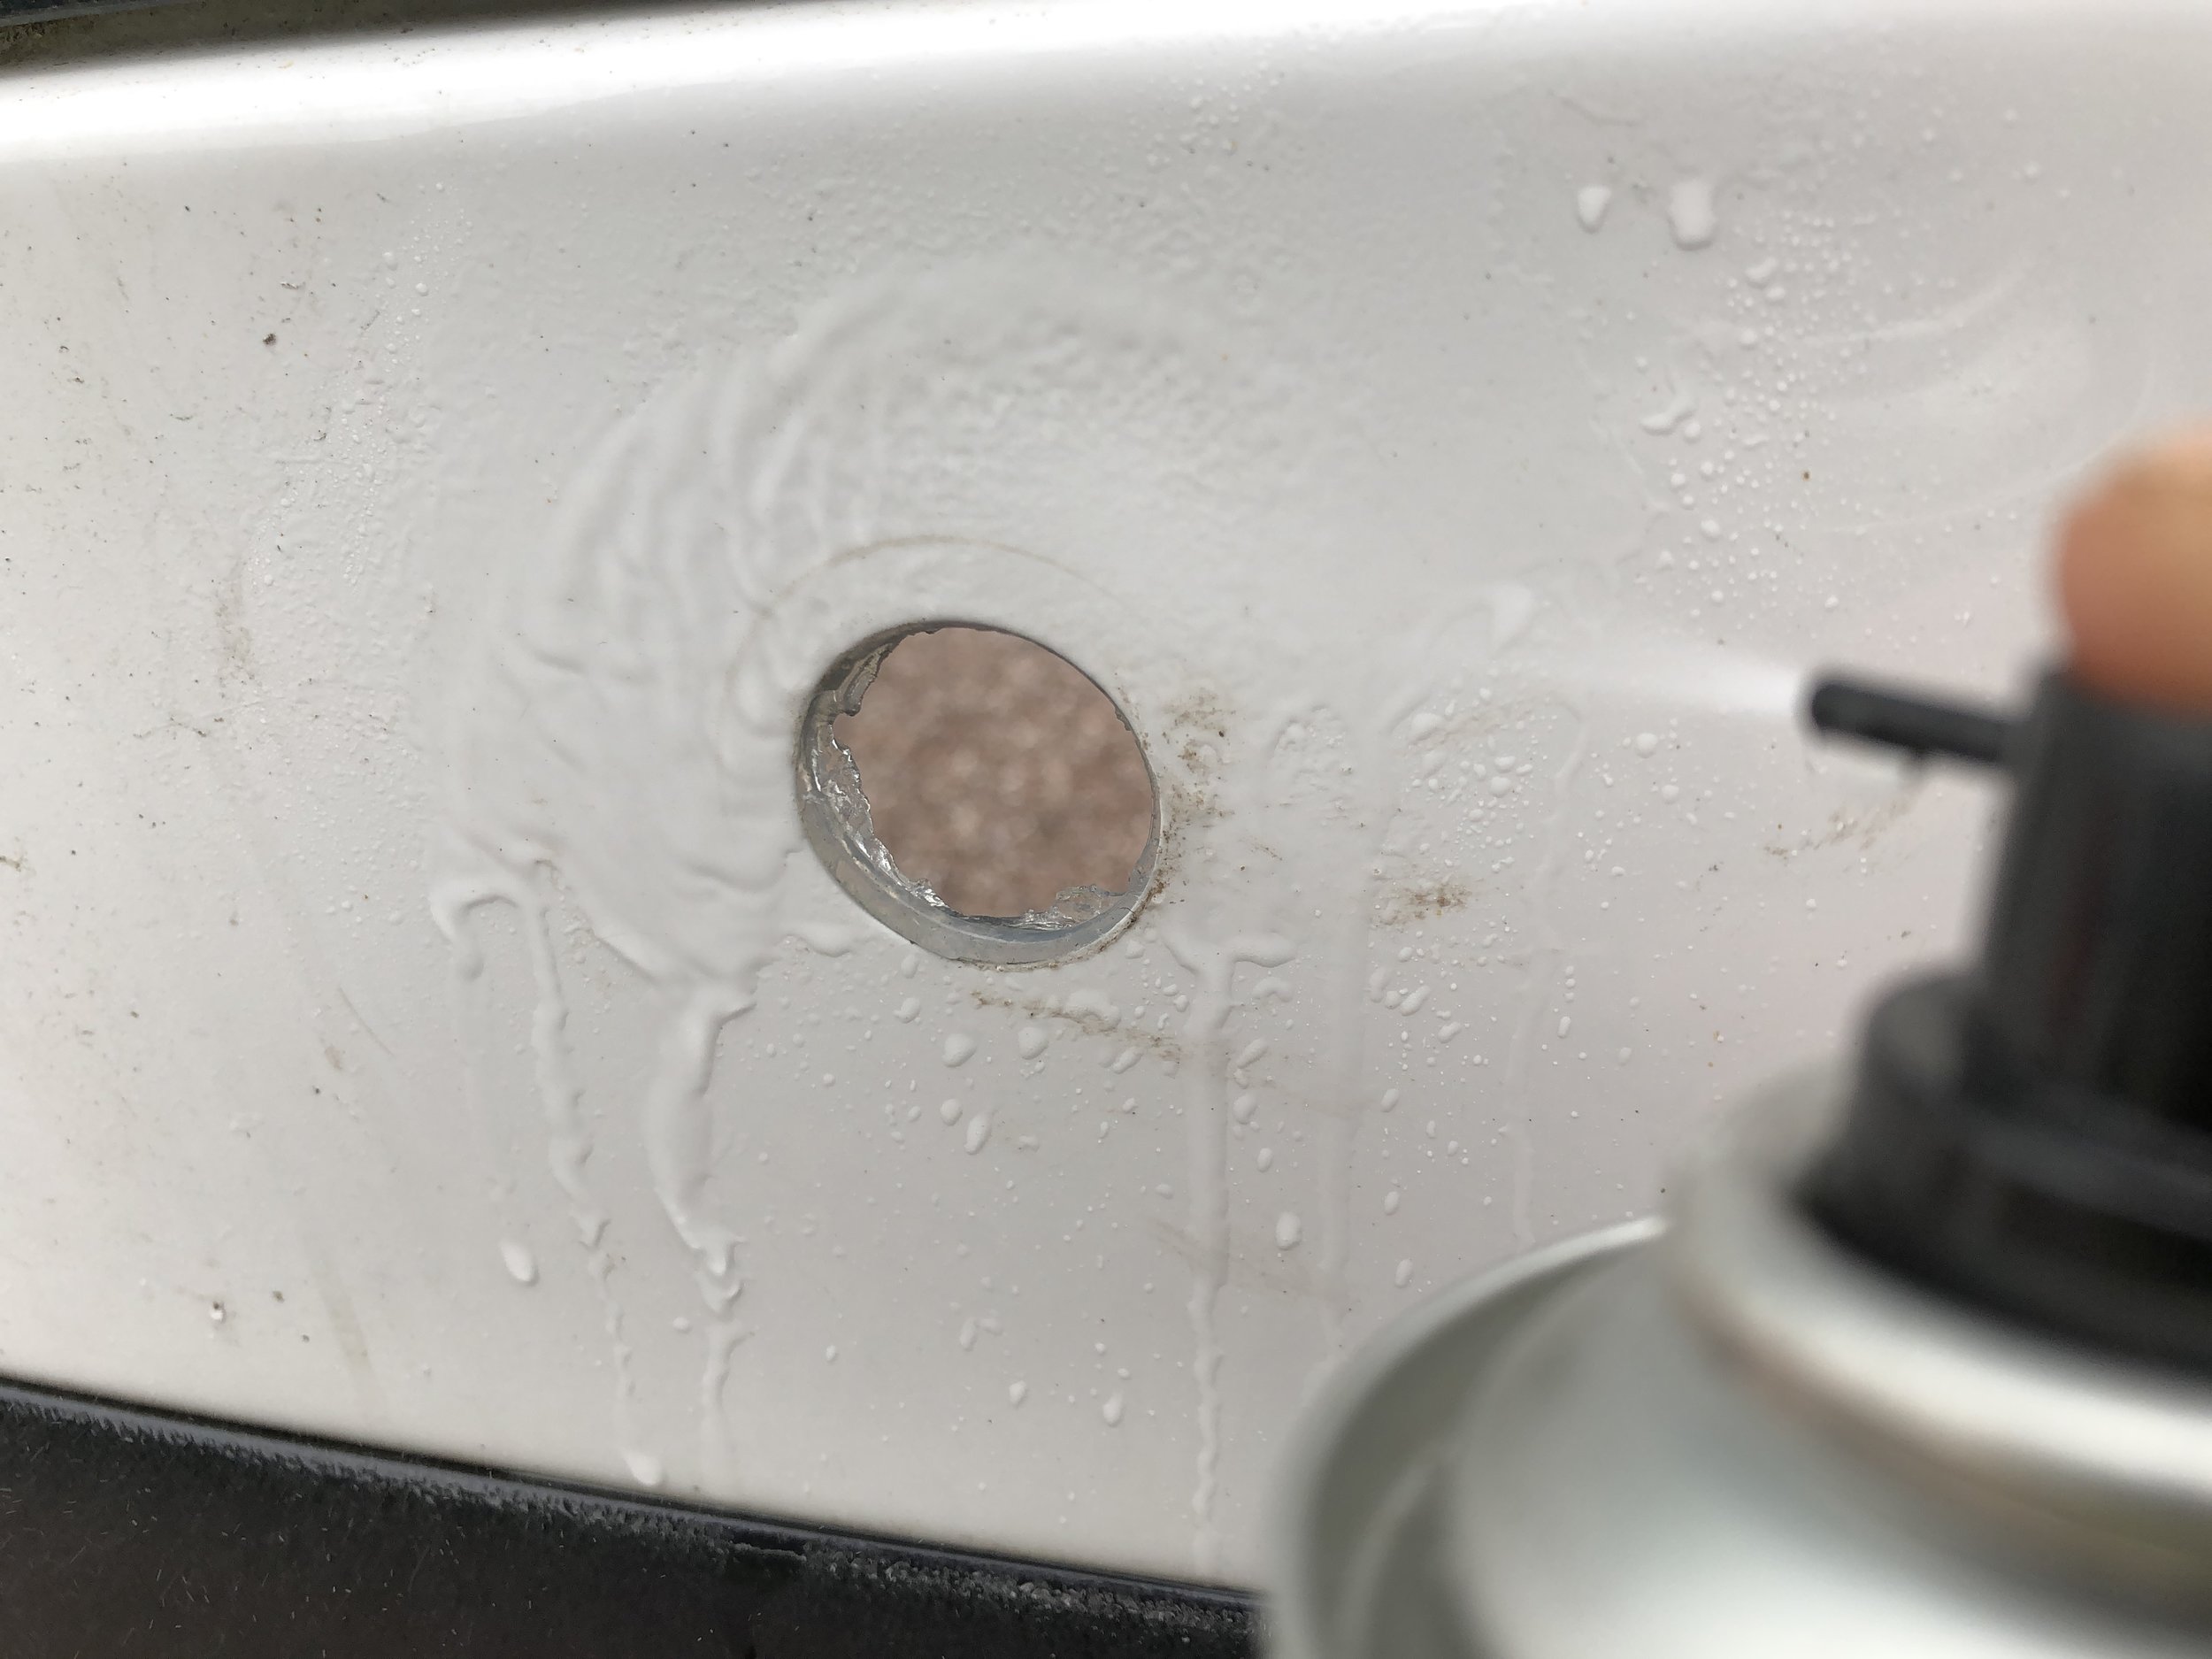
I started by adding a small o ring washer to the bolt to waterproof it. Next I cleaned up the hole in the Caddy left from removing the windscreen wiper with brake cleaner and a rag.
Having found that a bike top cap or headset top cap pretty much perfectly fits the hole in the door perfectly, I decided to colour code it to the van and use it for the exterior. There are some pretty cool colours of top cap available on the market though if you wanted something different
Then I put a bit of sealant around the inside of the Caddy door and around the top cap which will be used to cover the exterior of the van door.
Next I constructed the device around the door, as pictured, here is the order of components used on the interior of the van door; top cap and bolt on the exterior then; headset spacer, a second top cap (a large spacer will do the same) and a star nut on the inside.
As the top cap on the exterior of the van is tapered it protrudes through to the inside. A headset spacer fit perfectly up underneath the old wiper motor bracket and allows the bolt to be done up tightly to seal the door.
Finally I wiped off any excess sealant and tightened the bolt firmly to form a good seal around the van door. After 24hours I tested the device with a jet wash and the VW Caddy rear wiper delete is totally sealed!
Hopefully this guide helps and inspires with any of your own rear wiper blanks. Its a really quick task and in my opinion looks pretty good without the need to weld up the door or spend loads on a plastic bung that needs sealing anyway.
How To Build Your Own Bike to Van Axle Holder/Hitch | For Bolt Through Axle
This bike to van axle stand is the perfect solution to holding your bike safely in transit.
If you are anything like me everything has to have a place, especially in the back of the van! I get so fed up when driving… You hit a corner and everything in the back of the van crashes together 🤬 This bike to van axle stand is the perfect solution to holding your bike safely in transit.
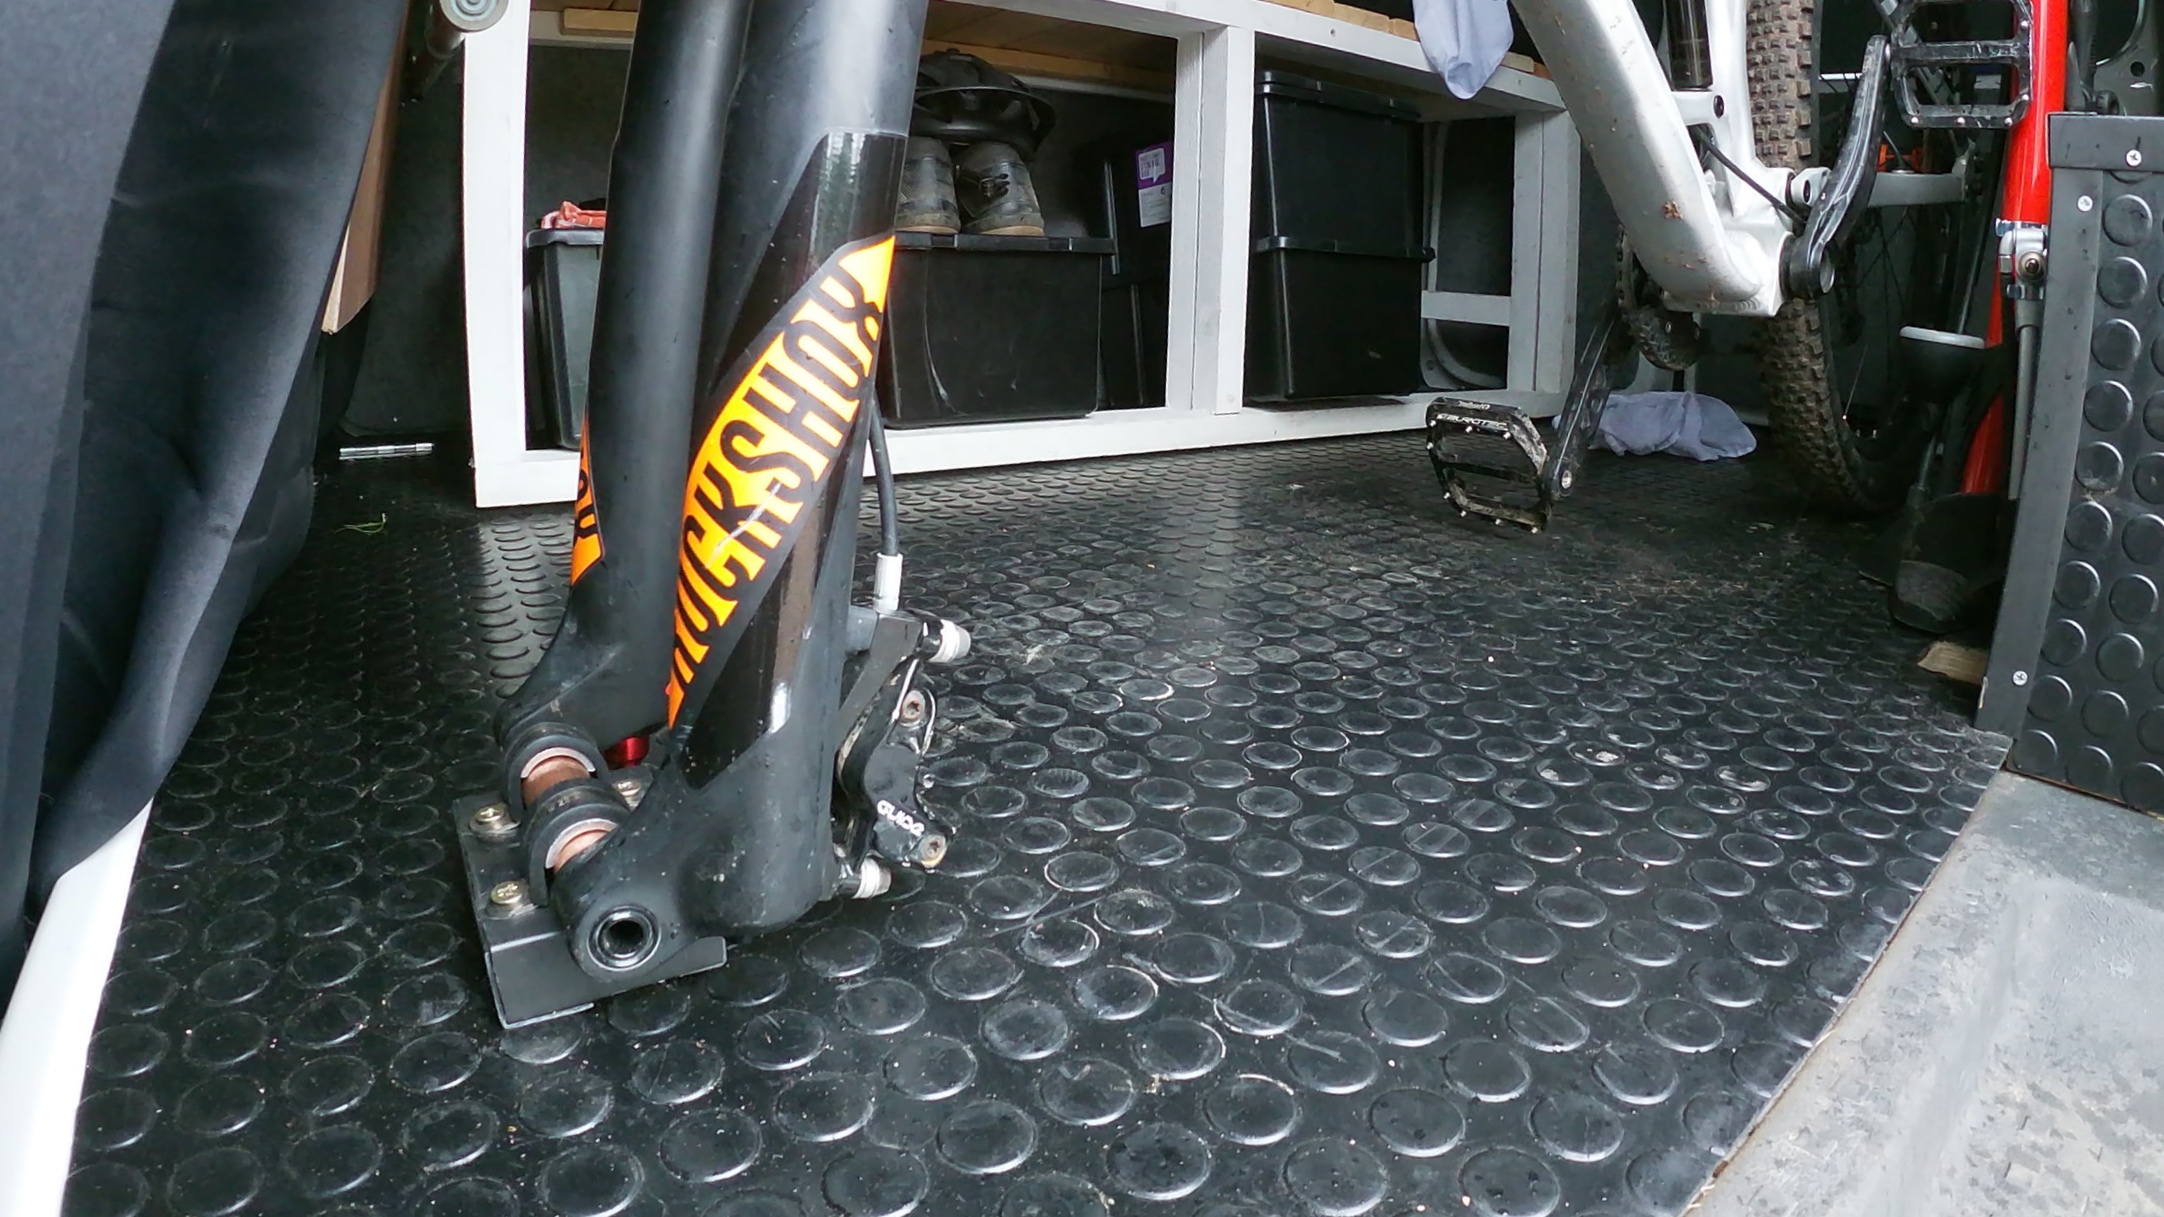
The axle stand or bike hitch is not a new invention, however I have found it really difficult to buy one at a sensible price that actually fits all of my various bikes, so have decided to make my own at a fraction of the cost. For those that are unfamiliar this stand basically replaces the front wheel of your bike and holds it in an upright position without the need for straps in the rear of your pick up, van or even shed.
You Need For Your Axle Stand
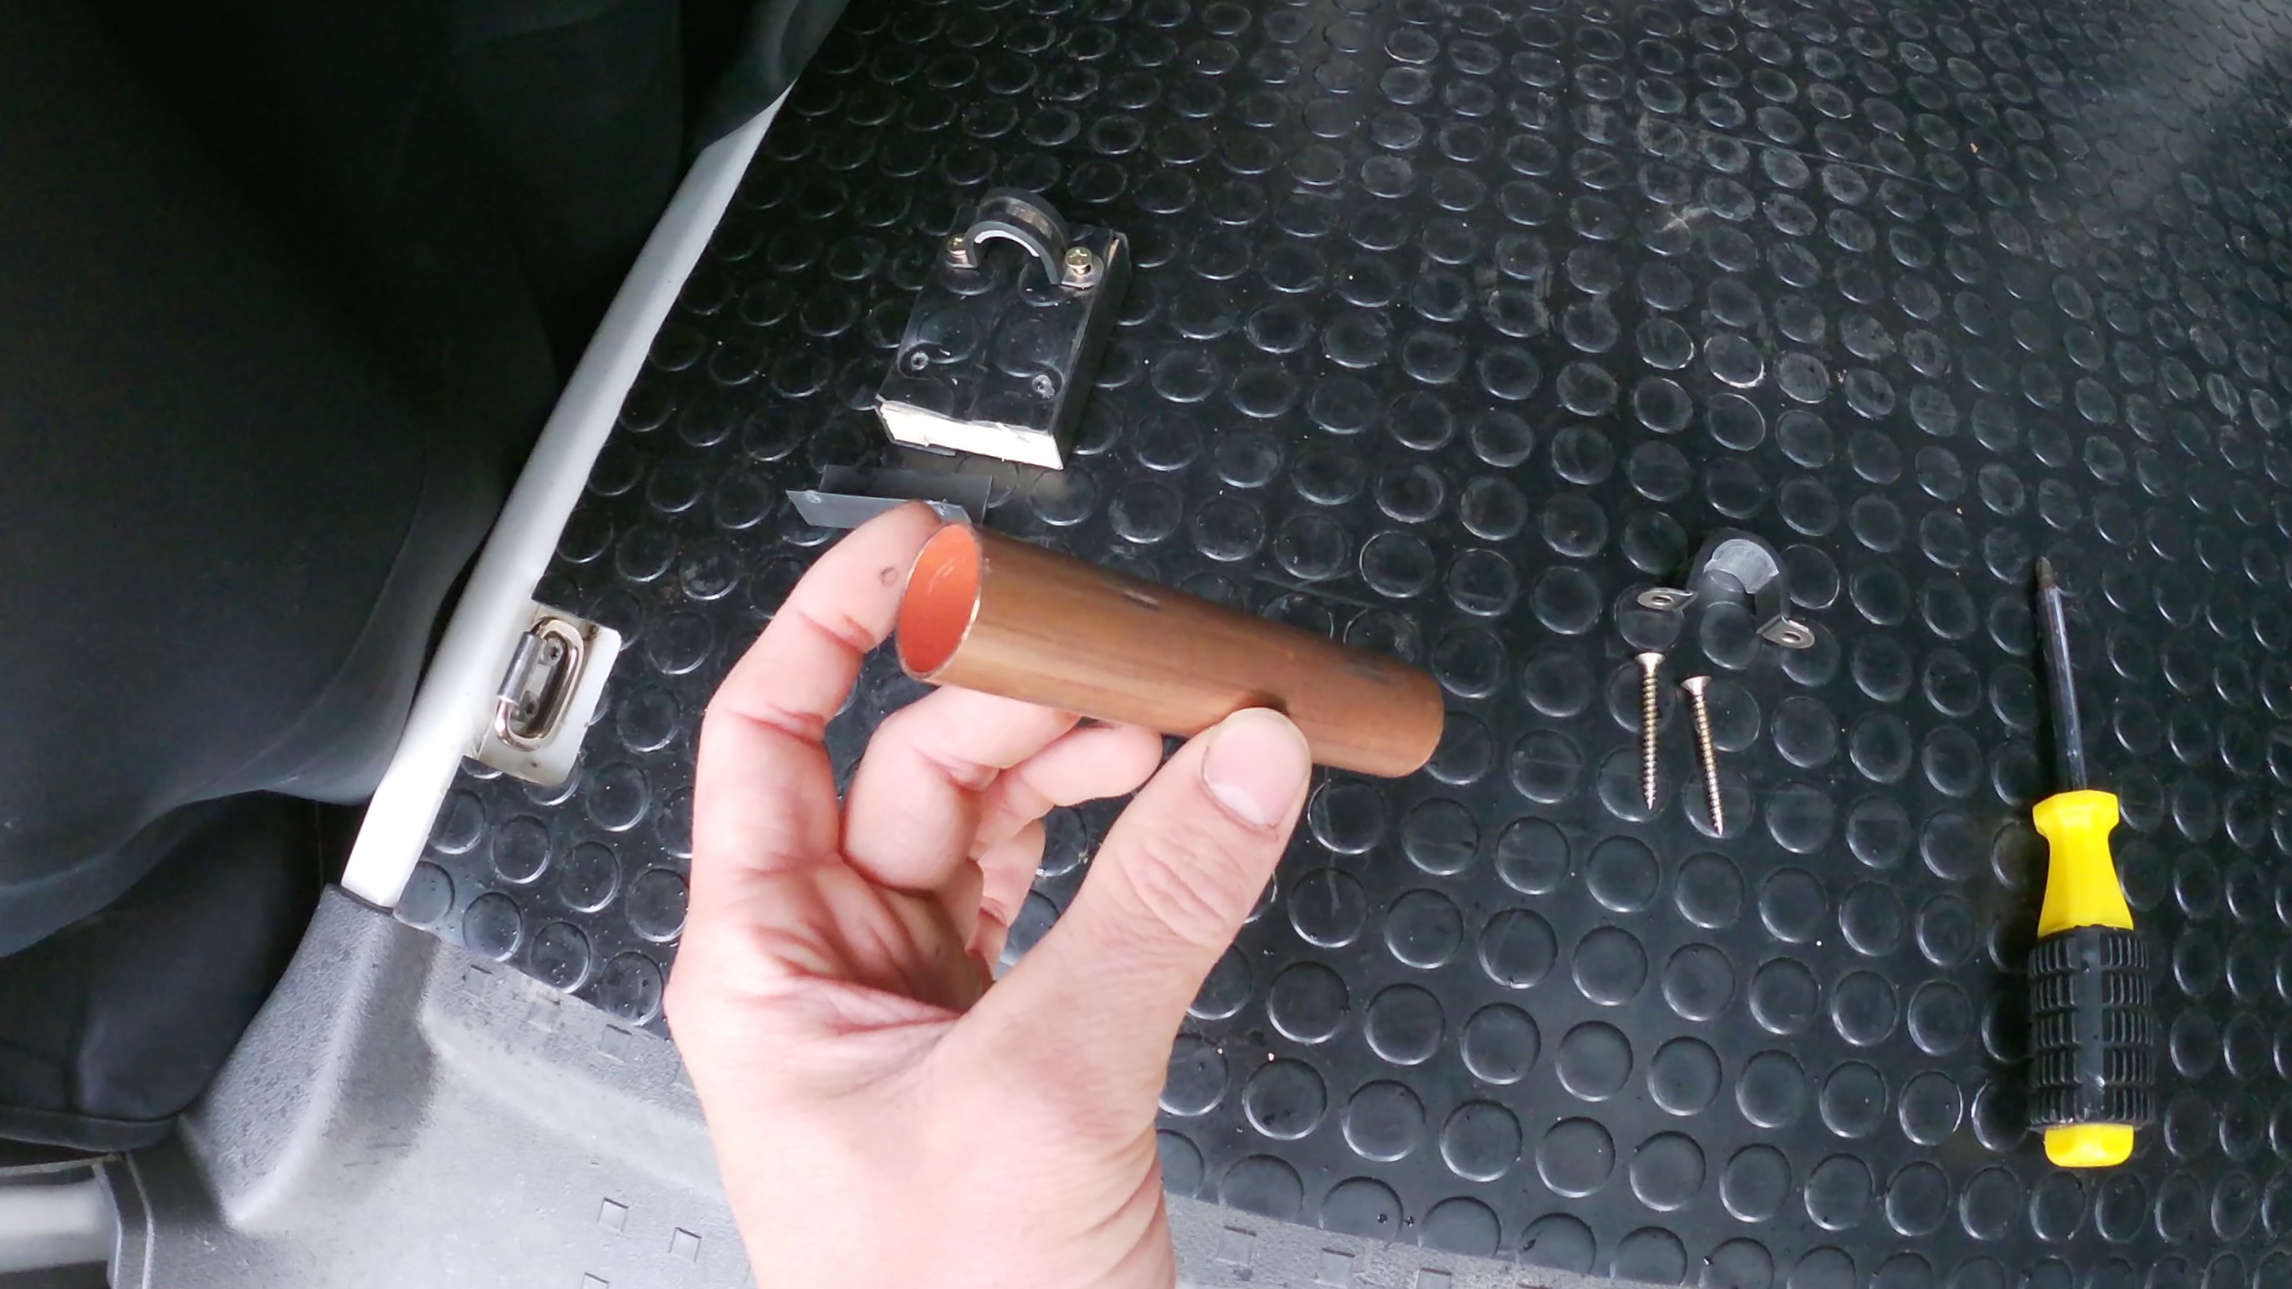
Metal Pipe of the correct diameter of your axle (I have used copper pipe)
Saddle Clamps x 2
Screws x 4
Screw Driver
Hack Saw or Pipe Cutter
Optional
Wood Block or Spacer
Additional Spacers
Smaller Diameter Pipe
Finishing Trim
Building Your Axle Stand:
Firstly cut down your pipe to match the width of your forks (front hub size). As I have various bikes with different size forks I have cut it down to the smallest width I have and will use spacers for the bigger bikes.
I have used a block of wood as a spacer to lift my axle stand off the floor to allow space for the damping controls on the underside of my suspension forks. This should be no wider than the pipe you have cut down.
I have also covered my wood in matching rubber and black plastic trim to be in keeping with my van interior
Finally decide exactly where you need the stand and screw down through the saddle clamps and wooden spacer into the van floor, ensuring the pipe is sitting in the right position… This can be fiddly!
Then you are ready to go! Using a small bungee i found was the best way to keep the spare front wheel in check.
Troubleshooting and Tips:
Double and triple check the positioning of the stand so that all doors can close etc with the bike in there!
If like me you have several bikes, getting them to all fit the stand can take some engineering… For example I have a 20mm axle DH bike and a 15mm Axle enduro bike. I found an aluminium factory from ebay. They offered several options for aluminium tube inner and exterior diameters. I managed to find an aluminium insert to my copper pipe that was a 15mm inner diameter but a 20mm outer diameter so I could just add this in when using a different bike.
Thanks for reading and happy axle standing! Feel free to get in touch via the contact page with any queries.
How To Service Cup and Cone Bike Hubs
Cup and cone bearing hubs are found on road bikes, hybrids and mountain bikes. It is more common on modern fairly basic stock wheels however, Shimano use a cup and cone system on all of their hubs.
Cup and cone bearing hubs are found on road bikes, hybrids and mountain bikes. It is more common on modern fairly basic stock wheels however, Shimano use a cup and cone system on all of their hubs.
A decent quality ball bearing or cup and cone hub will last a long time if serviced properly and regularly. Also you may find that as you ride your bike over time your hub needs some re-adjustment to keep your wheels running smoothly but without any annoying wobble!
In this video we show you how to; remove your axle, cone and bearings, properly service the hub and then correctly re adjust the hub tension afterwards.
You need for your cup and cone hub service:
- Grease
- Rag or tissue
- Brake Cleaner
- Cone Spanners
- Magnet
- a Small Pick
- Dish
Icetools make a pretty cool combi style cone spanner set, they aren't the best quality of spanner but good for the infrequent user: https://www.merlincycles.com/icetoolz-cone-spanner-set-44518.html?source=PHG
Trouble Shooting and Tips:
1. On a rear hub it is best practise to start non drive side. This is because you will find it difficult to get a spanner onto the cone on the hubs drive side, it tends to sit inside the free hub body.
2. Most often achieving the correct tension on the cones and bearings is the trickiest part. The idea is to tighten the cone just enough to stop any side to side movement, but also ensure minimal friction between the cone and loose ball bearings so your wheels turns freely. In the video we outline how this is done but bare in mind it does take some practise to get it right.
if you are having any difficulties or just need some further advice do not hesitate to contact us and we will be happy to help… Good Luck


